Welcome to Platoon Forward!

Welcome to the site where the story of the battle is as important as the battle itself. Here we will focus on men thrust into extraordinary situations of life and death. They must lead other men with duty and honor to meet their countries objectives. Some will be blessed with great skill, some will carry great shortcomings. No matter what nation, no matter what war, no matter what theater, they are all called to move their Platoon or Squadron forward!

These are their individual stories as played out using my various campaign rules . Hopefully these stories will entertain and inspire you to use your own troops, airmen and sailors to accomplish your own great heroics.

Tuesday, June 20, 2023

The battle of Shay's Hill

 I continue to experiment with AWI Fire and Fury.  I also had an good conversation on TMP about the maneuver chart and disorder.  Enlightened, I have not messed with any of the game's modifiers and only made 2 changes to the maneuver chart.  A "1" now results in a hold action similar to battlefront and a "5" on the disordered column now results in a " no rally but no move" except for a voluntary withdrawn if desired.  

I also worked on my Piquet like cards and have 5 basic cards...


 so it plays faster as most decks will have 6-8 cards.  Because the card deck is so small you can't do impetus like piquet or one side easily will not get to move.  So...

If one side wins by 3 or more they draw 2 cards and then their opponent draws one.  Otherwise


the winning player draws one followed by the second player.  This way both players are going to go through their small deck but one side will have the OODA loop advantage.  

So to test all this stuff out I present to you the Battle of Shay's hill.

This battle took place just before Brandywine and for some reason isn't mentioned in any history books that I can find.  On your way to Philadelphia, before you get to Brandywine creek you come to Sherrywine creek. Here Washington planned to stop the British.  But the British took a left hook around the american forces and came down to them from the north.  Washington sent Brig Gen Henderson with the 3rd and 4th VA to stop them while he figured out where the main british attack would be.  Henderson selected Shay's hill as his defensive anchor.  When it was apparent the the main British effort was indeed moving in Henderson's way Washington quickly dispatched the 3rd PA with a detachment from NJ and some dragoons.  This is where we pick up our battle.

US forces All forces Reliable except NJ which is spirited.

BGen Henderson  Avg [able]

3rd VA 8  Vet  Col Bufford

4th VA 8 Trained  led by Col Flowers brave Col.  [ He also gets a leadership card as he thinks faster than most.]

4 3pdr guns

Reinforcements

3rd PA  8  Trained  Col Schaffer

NJ det 6 Trained, spirited LtCol Christy

The Battlefield.  Shay's farm top.  Shay's hill center.  Friend's meeting house right.  Reinforcements will enter left near Shay's farm after first reinforcement card is drawn.

Continental forces on Shay's hill.  3rd VA set up on right.  

The British forces organize at the meeting house.  5 regiments including 1 regiment of German Jagers dressed as British marines!  All reliable, all veteran except the Highlanders who are elite.  

The attack starts off somewhat disjointed as the 60th foot [ led by Col Barclay] and the Jagers move faster than the rest of the british line.  

The Rebel cannon turn their attention to the 60th foot with thunder so loud it shakes the camera.

Better picture and the fire is accurate as Barclay steadies the men. 


The Jagers in open order attempt to move around Shay's hill.  The Highlanders will guard the right flank and strike a killing blow if the rebels don't run!

US Dragoons arrive a Shay's farm.  


The British left  moves into contact with the 3rd VA on Shay's hill.  On the right the 60th foot is disorganized blocking the 45th.  Henderson has sent word that the dragoons need to move to the right of Shay's hill ASAP to prevent flanking of the US positions.  


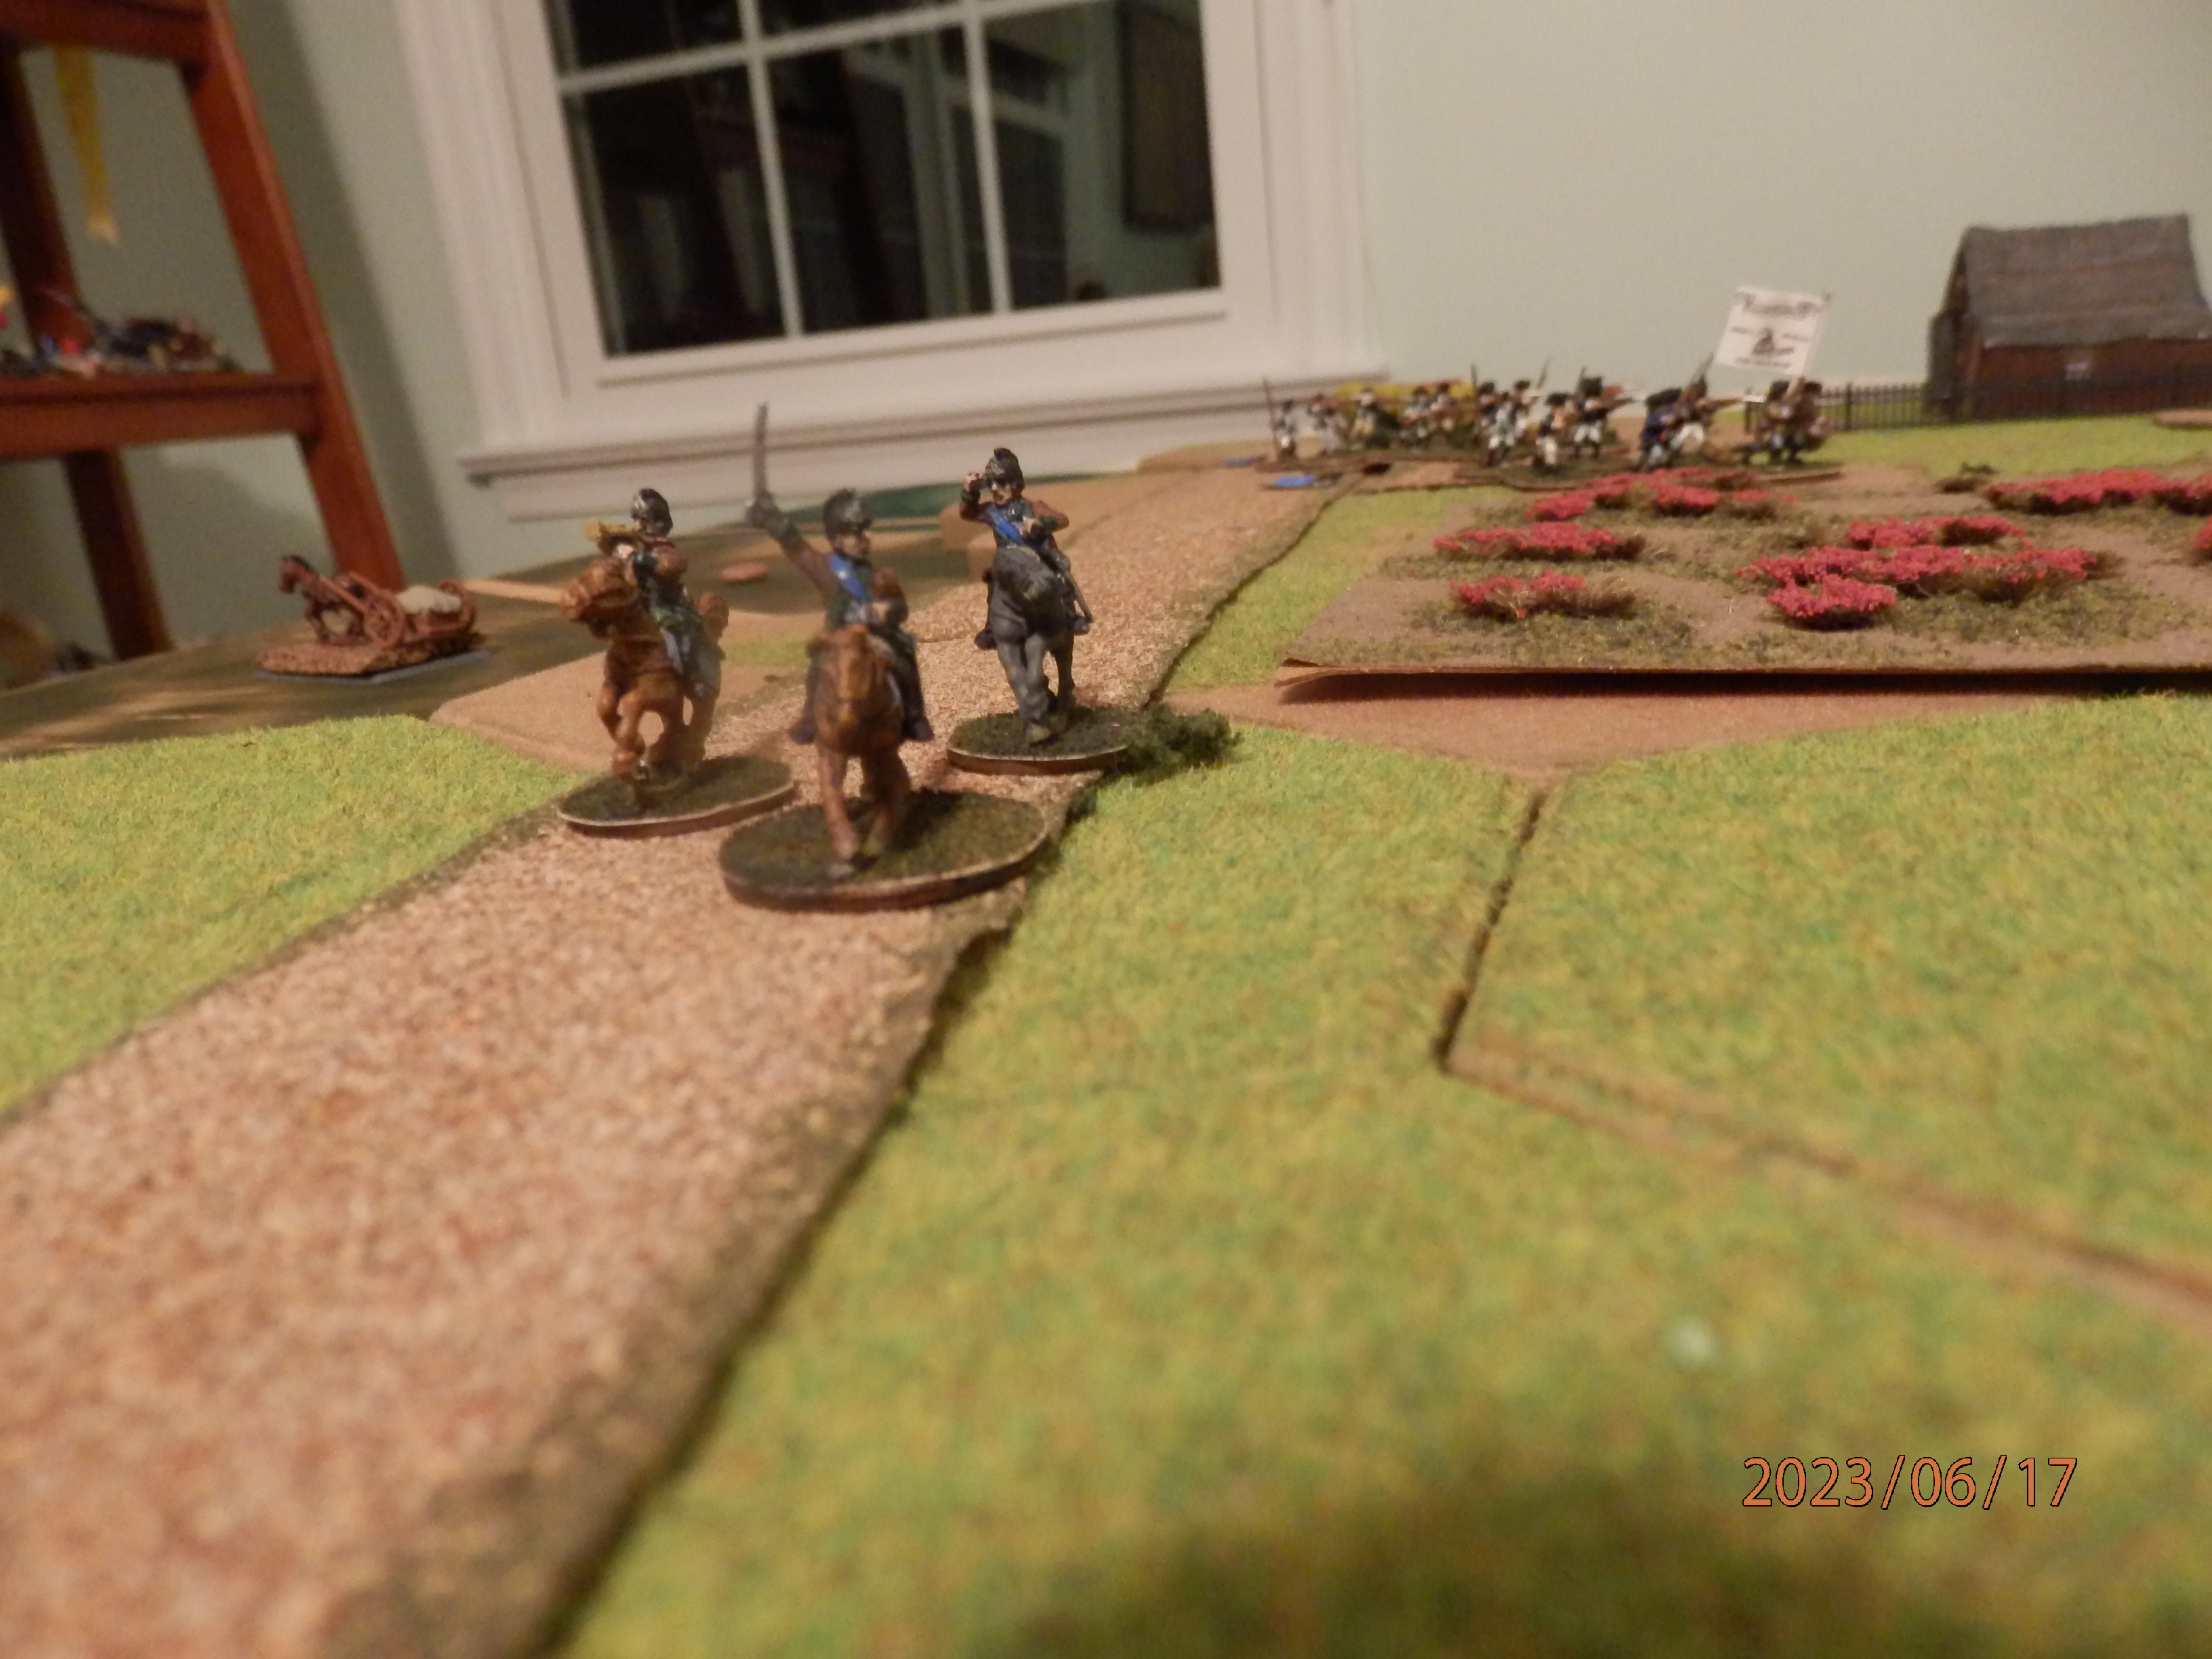
The dragoons race towards the hill.


A close up of the initial fighting on Shay's hill.  The pebble means the Jagers are disordered.  the  veteran
3rd VA holds their own against the Jagers but the 27th foot has yet to volley and they are a large unit with 10 bases.  

30 minutes into the conflict the battle swirls around the hill.  Losses begin to mount on both sides.  The British want to charge but need their ranks tight to do so.  Then towards the end of the turn...


the melee card arrives for the British.  the Rebels are not yet weakened to assure victory in close combat.  However, Col Barclay's 60th foot is facing 4 cannon and to miss this opportunity will mean enduring even more murderous fire.  His men are worn from the fighting.  Charge now and hope for the best or hold ground and hope for better support from the 45th in a few minutes.  Too many men are falling.  Captain, we charge now!!!!  

BGen Henderson was proud of his men.  His 2 regiments had been trading blows with 4 enemy regiments for 10 minutes.  This will show that americans are equal to those Brits.  He also had LtCol Christy moving up his New Jersey boys to tie into the hill while keeping the 3rd PA off to the left.  Suddenly, in front of the cannons the British troops roared and started up the hill.

Col Barclay gives the order to charge.  BG Henderson is next to the cannons but not attached.  Col Flowers of the 4th VA is within 1 inch so will be involved in the combat.  


Under murderous fire the 60th charges up Shay's hill.  Men fall as the British charge with cold steel.

This looks bad for Col Barclay and it is!  The fire is too intense and the British fall back.  Shay's hill is saved.

Seeing the 60th fail, BG Wells tells the 45th to tighten ranks!  The time has come to take this bloody hill.


The battle continues as losses mount on both sides.  The continentals morale starts to flag as both regiments become worn.  

A stray round mortally wounds BGen Henderson!  This will not help morale.  The 45th foot finally charges up the hill towards the trained 4th VA.  


This time the british are victorious and Col Flowers follows his men down the hill.  He wonders, "where are the reinforcements?"


With the British on Shay's hill the 3rd VA retreats.  LtCol Christy finally gets his men on the left flank of the hill but now they are facing 2 british regiments albeit one pretty worn.  Christy's men are spirited but they are only trained and are badly outnumbered...

They do not last long.  


With this it is clear to Col Flowers, who has assumed overall command, that they will not be able to effectively contest Shay's hill any further.  The Virginians went toe to toe with the British for 30 minutes and have nothing to be ashamed of.  He hopes, at some point, to find out what kept his northern allies from playing a more decisive role in the battle. 


Great game that was exciting to the end.  With small forces it played fast as well; solo coming in at under 2 hours.  What kept Christy from reaching the hill?  One turn the US did not get their move card.  The other turns he had half moves because I considered him out of command.  Neat result that drove a story.  As we play this out there will be some animosity between the Virginians and their "allies".  As to my changes to the maneuver table?  Only the "5" no rally came up once during play.  It was during the march towards the hill and caused a bit of a back up as Col Flowers had trouble reorganizing his ranks.

Great game that was small enough for me to play with my forces.

Enjoy!


Joe 


Saturday, June 3, 2023

Thoughts on Regimental Fire and Fury

 Hope everyone had a good memorial day and remembered all those who served and especially those who died and their families.  

I am not exactly sure why but I had a yankering for some AWI action.  All I had currently was Donnybrooke which are a very good set of skirmish rules but with my current kick of moving up from skirmish I decided to look at Rich Hausenauer's Fire and Fury system.  As readers will be aware I really like his Battlefront rules.  Turns out Regimental Fire and Fury has a free AWI variant on their website.  Who knew?  

I won't call this a review as you can find detailed reviews on line about how the game is played.  I will do what I have started to do about 2-3 years ago; tell you what I really like and don't like about the rule set.  I try to give you my biases up front and hopefully many of you will find this helpful if you are looking for new rules.  

My biases are I play solitaire and I really like command and control to be modeled well.  Command and Control can be fiddly if it adds value but I really don't like anything else to be.  I also am not very familiar with the Black Powder era.  Donnybrooke and Piquet Field of Battle are my only sets of rules. 


 Eye candy shot of a playtest game.  I have played 4 battles solo before I have done this post.  

In a nutshell Regimental F+F is a IGO UGO game.  However, there is a defensive fire phase which is critical in that in the black powder era melee is really where things get settled.  I suspect this keeps both players busy but when I play solo I am busy all the time!  Ranged combat in F+F is somewhat unique in that there are several modifiers but one of the biggest is the skill level of the target.  Since most of the adverse results are disorganization, this makes perfect sense to me.  In Melee training also is very important; more so than numbers. Regimental F+F also separates skill level from morale so you can have "spirited" troops down to "unreliable".   Regimental F+F has a maneuver chart for movement.  I freely admit I think this is the greatest thing since sliced bread.  On your turn you can activate every unit [boring] but each command has to roll a die to move it's units.  Since each unit has it's own modifiers it is possible that some units will move double quick while some will retreat.  Thus this table rolls morale and fog of war into the movement phase with one roll.  While this can be time consuming at first after a while you realize which units are "fine" and which units you actually have to check on; brilliant!  It is the same concept for Rich's Battlefront rules and why I love them.  


 My scotts charge some pesky rebels.  Each unit is a regiment made up of stands that represent about 40 men.  I think these are companies but I still get confused with the black powder nomenclature.  The rules say each stand is to be an inch with 3 figures on it.  There is no way I have close to that many figures for 2 armies.  For now each figure is a stand!  

The AWI variant for Regimental F+F is free on the fire and fury website which is a great service to gamers.  As you might expect muskets are the weapon of choice so ranges are short and cavalry are even less of a factor.  Militia are introduced and they can only be in open formation.  A fourth morale state is introduced, "dispirited".  This is for much of the militia that basically broke after taken any fire.  It works well in the game as these formations are extremely brittle.  


   Brittle militia fighting off cavalry.


My thoughts:

Good Points:

I love the maneuver table for Regimental F+F.  As I have stated before, I think this efficiently combines several things into 1 die roll and introduces some fog of war.  It makes this game easier to play solitaire.  It is the reason you should buy this game.

I am no expert but the way the formations interplay and how the game flows makes sense to this neophyte.  I felt like a brigade commander moving regiments around. The scenarios are designed for several players to have several brigades but I think for a solitaire player a brigade a piece is about right.

Good Leadership matters.  A good brigade commander is "able" and gives you a +1 on your maneuver roll. Some regiments can have a brave Colonel and they get a +1 in melee.  I like that sort of thing.

Less than Good Points

Combat seems very forgiving and recovery from "disordered" results seems easy.  With Rich's WW II game I actually toned down the combat tables a bit; here I think I will need to do the opposite.  I freely admit I am no expert in black powder but it is very difficult to remove a stand with ranged combat.  I suppose it is hard to hit 20 men with a musket at 60 yards.   More concerning to me is the easy recovery from disordered results.  Maybe I just roll well but in 4 games I had only 1 unit rout.  This doesn't take away from a great game and with some tweaks to the maneuver table this can be fixed.  For instance I might take away the +2 for "fresh" units and see what happens.  

Command and Control is still not enough for me.  There is probably no game that will have enough out of the box for me on this.  The maneuver table does a good job in simply modeling this and I think most gamers will be happy with the system as is.   But I want to be able to show a single regiment reacting quicker or slower due to C+C.  I will port my Piquet cards over and add individual leaders that are eaither really good or bad.


   Col Brighton steadies the 42nd Foot as the enemy gains local superiority...

Overall I think Regimental Fire and Fury is a great rule set. It plays like what I think black powder should play like.  It introduces C+C/fog of war with a simple die roll and the game plays smoothly.  I feel like I am maneuvering regiments on a battlefield. It is pretty easy to play solitaire and if you add some Piquet like cards it should be even easier.  Rich has done a great job;huzzah!


Joe 


   Its those scotts again!