Welcome to Platoon Forward!

Welcome to the site where the story of the battle is as important as the battle itself. Here we will focus on men thrust into extraordinary situations of life and death. They must lead other men with duty and honor to meet their countries objectives. Some will be blessed with great skill, some will carry great shortcomings. No matter what nation, no matter what war, no matter what theater, they are all called to move their Platoon or Squadron forward!

These are their individual stories as played out using my various campaign rules . Hopefully these stories will entertain and inspire you to use your own troops, airmen and sailors to accomplish your own great heroics.

Wednesday, July 13, 2022

Barge busting 1812 style

 Not getting a lot of wargaming in lately.  Two game of SAGA and several of Deadball but finally playtested a scenario for the war of 1812.  In the great lakes supplies were often transported by small boat flotillas not unlike "the slot" 130 years later.  They would sometimes be escorted by larger ships.  Of course it was hard to close with these convoys when you were in a sailing ship and not a PT boat...

Lt Mapes was so excited that he almost ran back to the USS Fair American.  Finally an important mission where he, scratch that, his ship was the star!  He called out to Mr Beckam that he had news of an important nature.   Spies had heard of a convoy going to the Niagara isthmus in 3 days time with supplies for the British army.  The Fair American and the USS Oneida were going to intercept.  They would fly British colors to get close enough to fire at the boats.  Because of their long 32 and 24 the Fair American had not only been chosen but would lead the Oneida into the fray.  Finally a good reason to be stuck as a captain of a converted merchant ship!

March 1813 on Lake Ontario.    Winds moderate straight off the shore


  USS Fair American [ 2 gun Merchant Schooner] followed by USS Oneida [ 18 gun brig] on left

HMS Beresford [12 gun Schooner] escorting 9 supply boats on right.  


At 2000 yrds HMS Beresford signals "What ship?" asking for the identity of the incoming schooner.  Lt Mapes signals "repeat" or at least what the americans think is "repeat" as they continue to close the distance.  Unfortunately...

it doesn't appear to fool anyone.  The boats and the British schooner all turns towards shore.  Lt Mapes orders the US colors hoisted aloft.  


The USS Fair American opens fire on the boats at 300 yards.  "Excellent shooting Todd!" exclaims Lt Mapes as one boat disappears with a direct hit!  

The British schooner fires on Lt Mapes.  It rattles the rickety hull and causes several casualties among the crew.  

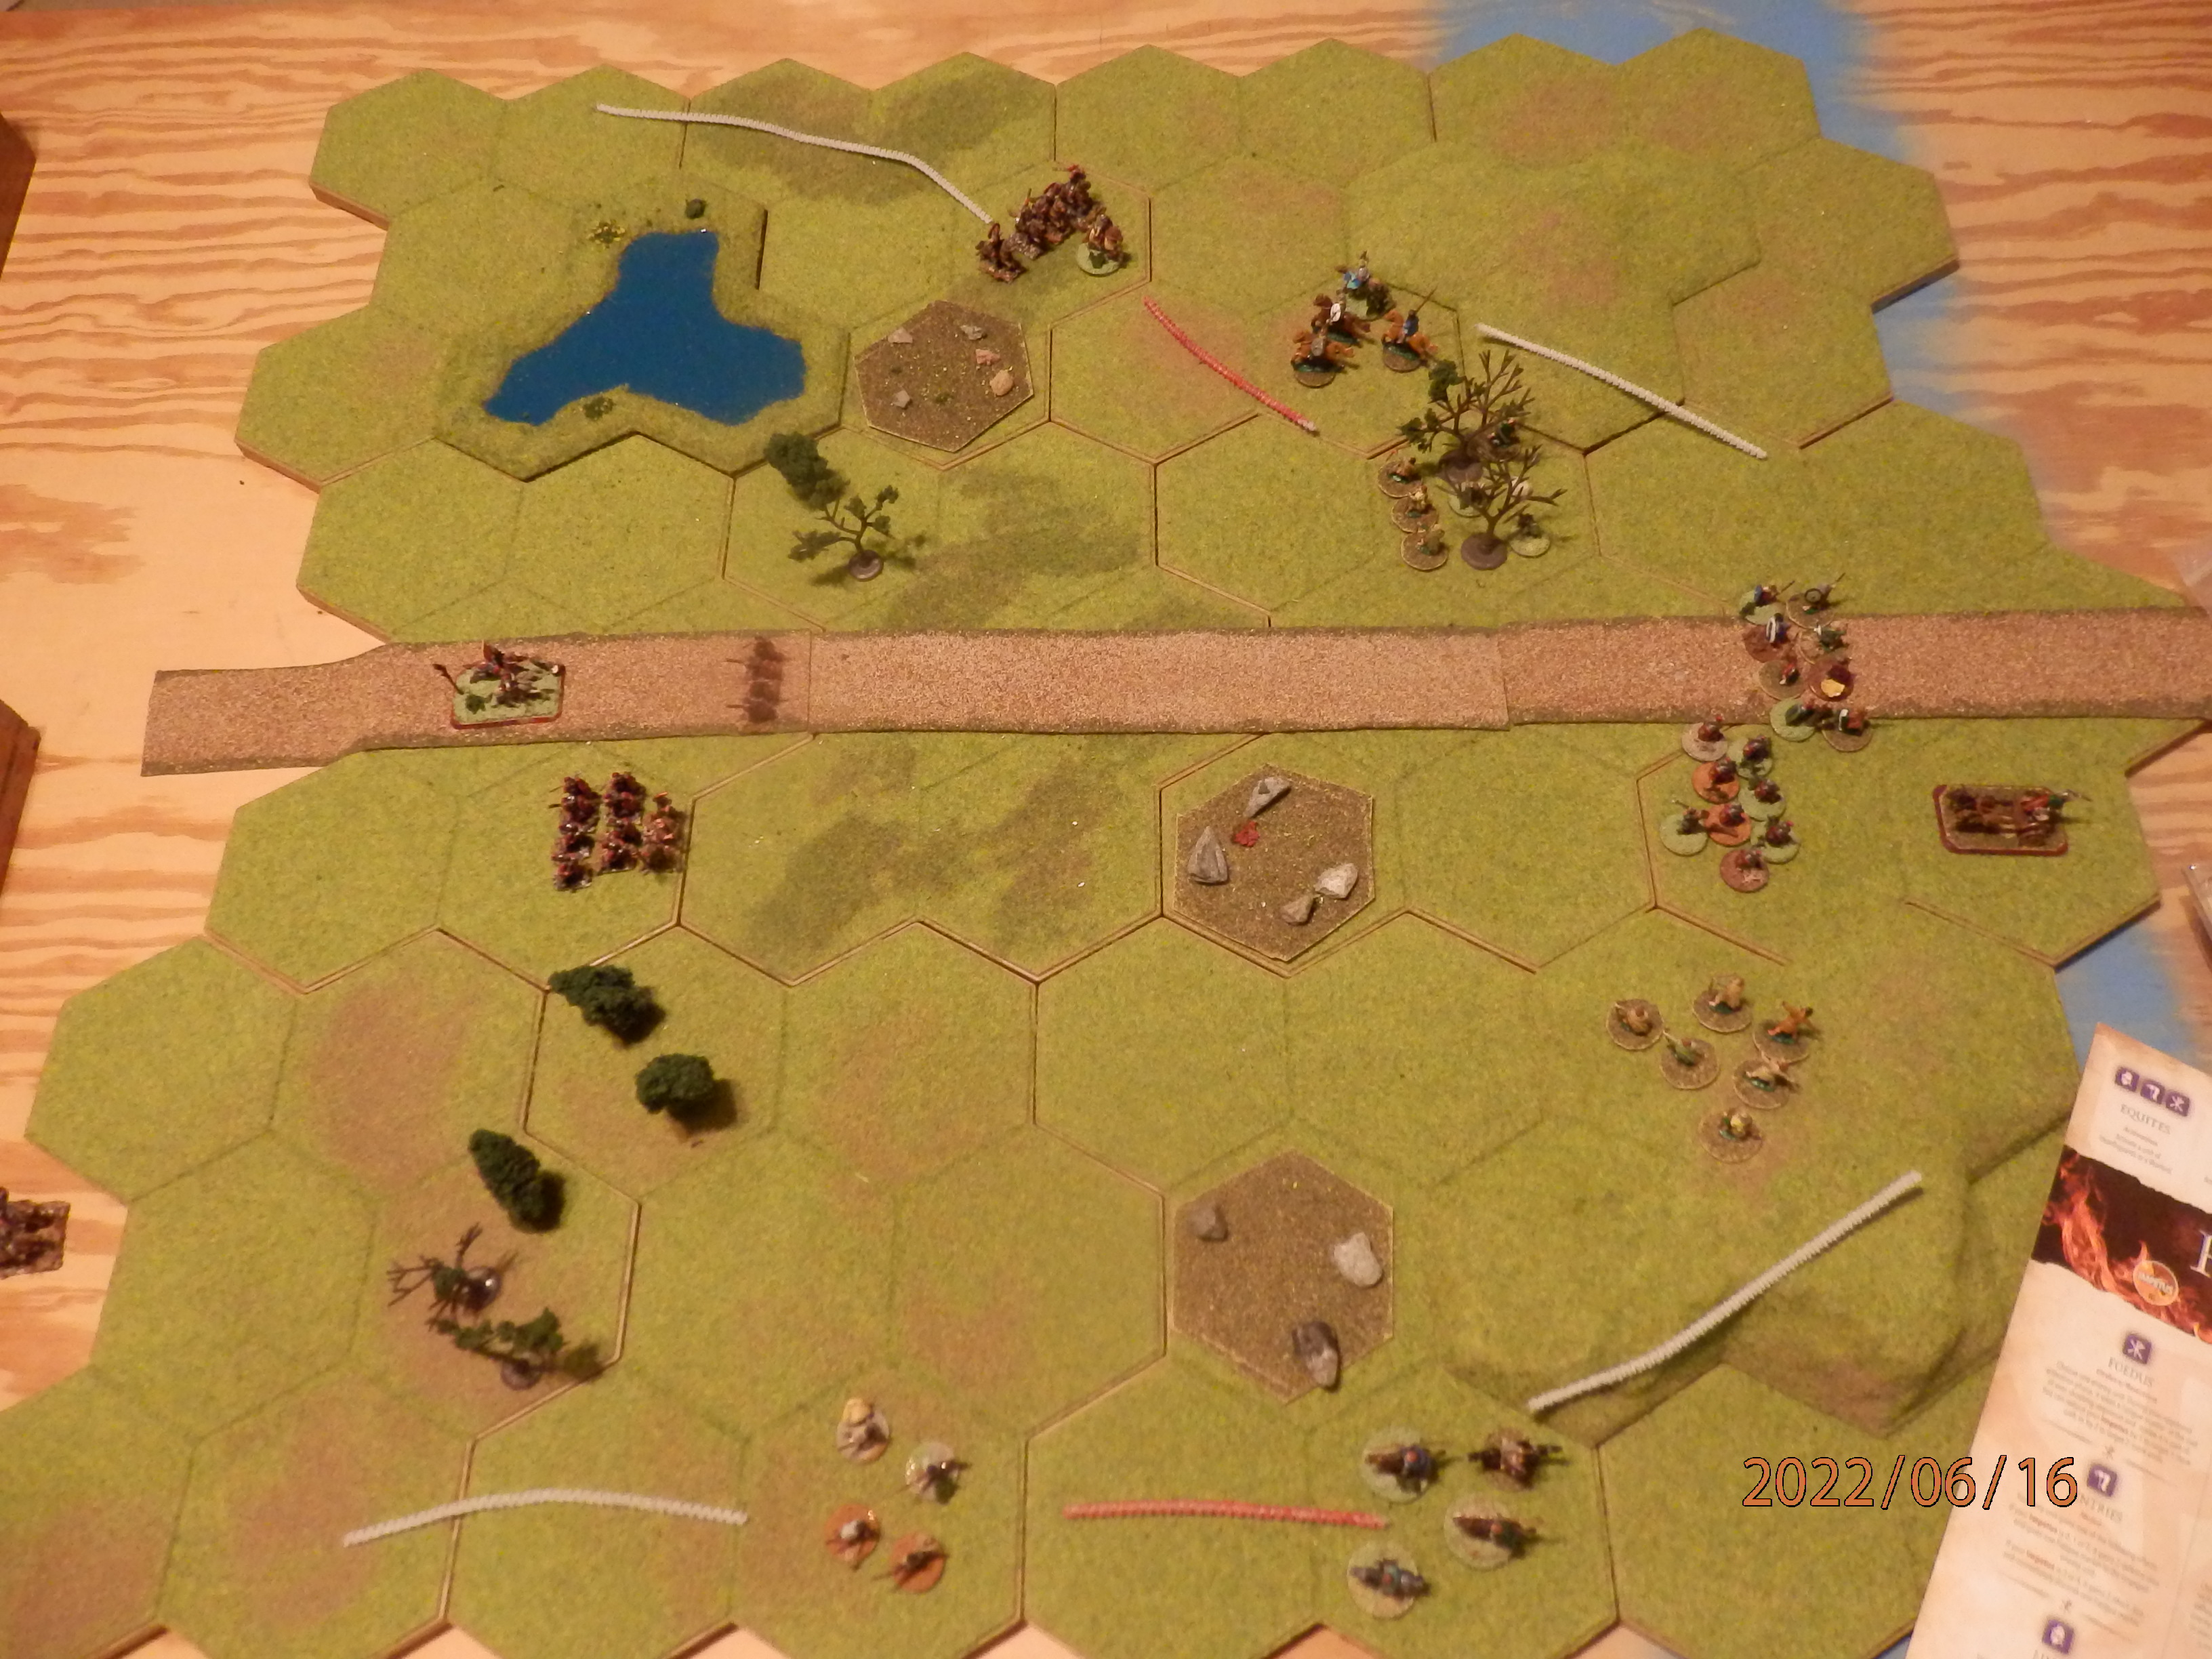
Overview of the battle.   The 2 US ships closing range towards the boats.  The Oneida armed with Carronades needs to be very close to hit anything. 


 As the british boats sail towards shore the USS Fair American fires again.  This time they dismast one of the boats.  The british schooner moves towards the Oneida.  


The HMS Beresford and the USS Oneida trade broadsides.  Both ships are marginally damaged.  


Lt Mapes dares not to get too close to shore.  He orders one last volley against the fleeing boats. He dismasts another boat.

The USS Oneida fires one last shot as well.  At this range she misses.   

With the HMS Beresford heading to open water the americans realize their chance has ended.  1 boat sunk and 2 damaged.  Not brilliant by any stretch but not terrible.  The US casualties are very light.  The USS Fair American has played her part and not been found wanting.  "Mr Beckam, let's take her home."

Fun, quick game.  Will need to work on the parameters and then hope to post this.  

Couple more pictures

First....

For those of you that play Post Captain I created this to keep track of reloading times.  I hate writing stuff down.  

Second...

For those of you on the Post Captain forums, here is the USS Hancock card I created.  This is one of the original US Navy frigates of the revolutionary war.  


Enjoy


Joe


Tuesday, June 21, 2022

Romans vrs Picts SAGA style

 Very busy couple of weeks for me with little time for gaming.  Realized I need some more US troops for my 1st Cav in vietnam if I want 3 figures per squad with 2 companies on the board at once.  So I opened a pack of battlefront figures that I have had for several years and set up a new squad.


For grins I am using the battlefront base with railroad matting over it.  This will save me building up the base.  Will see how it looks.

Also realized I only had a section of Pattons.  I needed another one so viola!

Almost ready for action.  Still need to add the TC figure.  Hopefully you will see these both near a rice paddy in the near future.  

So wanted to do something different and didn't feel nautical-- how about SAGA?  I am not much of an ancients guy but SAGA is such a fun game and it feels like how I think ancients should work that I really enjoy playing it.  I am sure if I was more of an ancients devotee the system would seem gamey and upset me but since I am not let's play SAGA!

Pattonus Tankus hoped his men felt the determination that he felt.  The Picts had conducted yet another raid killing more innocent Roman's and Britons.  "We must teach them a lesson they won't soon forget!" he had told his men.


  Pattonus Tankus leads a 5 point army as I have to get familiar with the rules.  I use V2 rules but Roman calvary are classed as warriors here as the legion still reigns supreme.  

3 pts heathguard infantry

1 pt warior calvary with javelins

1 pt numidian skirmishers.  

Numidian skirmishers

Roman Forces


The Picts have

2 points heathguard calvary with javalins

1 pt warrior infantry

1 pt levy archers [ they split them into 2 groups]

1 pt roman deserters

The Pict leader

Pict infantryman

Dastardly roman deserters.   Bonus for capturing them so they can be crucified!  

I keep it simple with Clash of Warlords scenario.  [ Basically engagement] Pattonus deploys cavalry and skirmishers to either flank with his legions in the middle. He hopes to use his light troops to keep the archers at bay while the legions do the heavy lifting. 

In this U-2 recon photo of the first turn you can see Pattonus' flanks move up and throw javelins while the Pict cavalry also moves up to block. 


 The legion also slowly moves forward.


Turn 2.  The roman cavalry continue to harass while the numidians [ each figure counts as two. Haven't painted up 8 yet] move up to have a go at the archers.  They hit one which is significant as in V2 a unit of less than 6 levies doesn't generate a SAGA die.  


During the Picts half of the turn their cavalry charge the skirmishers.  They hurt them and push them back which was the goal.  Unfortunately they take one fatigue for the battle but another for horses ending in rough terrain.  This will come back to haunt them.  

The rest of the Picts turn.  They pour arrows into the legions trying to reduce their strength.  The  Picts chieftain, wanting to get his monies worth, orders the deserters forward.  

At this point the U-2 plane supplying our images ran into a storm so we will have to switch to radio descriptions momentarily.  We apologize for the inconvenience.  

The legion on the road [ see above picture] deviates slightly and charges the archers in the wood.  They cause minimal casualties but take the wood and take no casualties themselves. Tankus, seeing the Pict cavalry dispersed on his right.  Orders the main legion to wheel right and charge.  They do so with devastating effect- wiping out the cavalry with minimal losses to themselves.   

In the Picts half turn...


their infantry charge the legion in the wood with very good effect...


the deserters fall on the legions flank.  It is at this point the Picts find out that the best legionnaires are not the ones who desert.  The attack fails. 

Images are now restored at the end of the Picts turn.  You can see the remnants of one legion in front of the wood above the road.  The deserters are in front of an angry legion below the road.  

The main legion finishes off the deserters.  Pattonus pulls his forces from above the road to below.

As the cavalry screens the withdrawal the Picts strike; they are rebuffed!


  Situation towards the end.  The numidians have weakened the near archers.  The Roman and Pict cavalry have fought to a draw which is a win for the romans.  The Pict archers near the wood continue to fire at the legion while the Pict infantry moves out to take out either the roman cavalry or the weakened legion.  

Pattonus sees his chance.  Ignoring the archers he moves up the skirmishers and legion for the kill...

With the Pict infantry weakened with javelins from the skirmishers and cavalry he moves the skirmishers into the wood [ blocking the archers from this position] and joins the legion for the final charge...


With three fourths of his cavalry gone, half of both his infantry and archers down the Picts fade away.

"This is a lesion I hope they learn well!" says Pattonus Tankus.


Great game that played fast.  SAGA always gives a great game.  In retrospect I shouldn't have split the Pict archers evenly as I lost dice too fast.  Either keep them together or an 8/4.  

Enjoy


Joe