Welcome to Platoon Forward!

Welcome to the site where the story of the battle is as important as the battle itself. Here we will focus on men thrust into extraordinary situations of life and death. They must lead other men with duty and honor to meet their countries objectives. Some will be blessed with great skill, some will carry great shortcomings. No matter what nation, no matter what war, no matter what theater, they are all called to move their Platoon or Squadron forward!

These are their individual stories as played out using my various campaign rules . Hopefully these stories will entertain and inspire you to use your own troops, airmen and sailors to accomplish your own great heroics.

Sunday, May 16, 2010

Final Playtest! Philippine Sea late 1944

Have the rules written for LAAF and for Bragging the Hun. Had some Corsairs painted up and 3 new Jacks as well. Time for a final playtest! I like to attack smaller ships, not only does it play faster but I have a chance of sinking them. Furthermore I don't have to worry about history getting in the way of the story. If I have the Yamato supporting landings off Guadicanal that doens't sound quite right!

The Japanese are desperate to get a supply convoy through to the Philippines. The oiler is their #1 priority. They have scraped together an escorting force to include the Tone and will try to get through the ring of american airpower. They have also assigned a CAP force to cover it's entry into Phililpine sea.


TO HQ IMPERIAL NAVY

TOKYO

FROM HQ NAVAL FORCES PHILIPPINES

SUBJECT AFTER ACTION REPORT OF US ATTACK ON JAPANESE CONVOY 22 DEC 1944 AND ANALYSIS OF LAAF AND BRAGGING RULES TO BTH 2 SYSTEM


Prepared by Cmdr Lee Gan (Due to US Freedom of Information Act we have full knowledge of US forces and plans)

Our convoy consisted of 1 CA (Tone); 1 CL (Sendi) 2 DDs (Kamakazi) 2 PG (Saga) 1 Oiler, 1 Large merchantmam and 2 medium merchantmen. CAP at the time of attack consisted of 3 Zero fighters and 3 Raiden fighters.

Enemy forces consisted of 4 Corsairs armed with rockets and 12 SBD Dauntless divebombers. (These should have been Helldivers but despite being an arsenal of democracy, at 1/300 scale the US currently does not have the funds to purchase these aircraft so SBDs were used instead. But admiral, you should see the detail at 1/300th...) It should be noted that the englishman who designed BTH 2 clearly showed his western bias when rating the Corsair's manuverability as a 6. It actually is a 5 with a good roll rate and was used correctly for this playtest.

It appears the devil's plan was to have the Corsairs sweep in first to supress the AA fire with rockets. 6 SBDs would attack the oiler, 3 would attack the large freighter and 3 would tarry and finish up whichever ship needed to be attacked.


The Blue Wave


Raidens ride the wave


The Raidens approached from 3 o'clock but were spotted early. The Zeros approached from 12 o'clock. The fighters broke up the divebomer's formation but the Corsairs kept them busy. Interestingly neither side could gain the upper hand which worked towards the enemy's advantage as the SBDs jinked their way towards the convoy. Only 1 SBD was shot down by a zero fighter. No kills for our brand new Raidens. 3 SBDs were forced to abort their deadly mission; one with a critical instrument damage, one with a fuel leak and one with the pilot WIA. This pilot, Ens Wholaver, blacked out and crashed his aircraft into the sea. Interestingly the brand new Corsairs also failed to score. 2 Raidens were damaged and forced to leave early.
Overall, I expected 1 more SBD and at least 1 Japanese fighter to have fallen in air combat. These lack of kills are attributable to the speed differences in the aircraft which made tailing difficult and poor shooting.

IJN Tone was the bulwark of our AA defense


Convoy right before the attack
CL far left; Oiler and Large MM next in tandem
2 small MM next in tandem followed by Tone
2 DDs flanking either side of large MMs off screen
2 gunboats flanking small MMs off screen
Attack came from top of screen

The Tone and Sendi opened up with heavy AA at long range and continued during their envelope of attack. The large mm combined guns with the starboard DD and managed to "Shake" an SBD early on. (This is the one SBD that missed the oiler due no doubt to this accurate fire) The Sendi then destroyed an SBD. As the attacker transitioned into Lt AA range the rocket firing Corsairs managed to supress the CL, PG and pin the DD. This significantly hurt the AA fire in the near attack run; decreasing it just over 50%. Several Corsairs recieved minor damage from flak but this is occured after they had fired their rockets. Just before a Dauntless started its dive for the large MM the Tone's 25mm guns finally hit home and it blew up in mid air! This is doubly impressive since our 25mm guns are far inferior to the devils 40mm guns for AA duties.
9 SBDs and 3 Corsairs started attack runs. They were in zone for flak for 6 turns. 2 SBDs were destroyed, 1 shaken and 2 corsairs recieved minor damage.
Overall these results are deadlier than predicted and the deadliest we have seen in any playtest. I would have expected a 35% chance of destroying an aircraft; the same for shaken one and close to 100% for one causing a plane minor damage. (nothing is 100% in probability except our ultimite victory!) The rules do play faster than the ones in BTH 2 as you are not looking up how many dice to throw. I attribute the convoy's success to their bushido spirit that overcame the odds facing them! Banzai!
Corsair on final run in for rocket attack
on Kamakazi

Corsair just moments after successful
rocket attack on the Saga
3 Rocket attacks were executed. All hit their targets as expected. The first on the kamakazi took out 2 25mm gun mounts with significant crew casualties. These rockets not only supressed the AA fire on the ship but the loss of these guns depleted her AA capability for the rest of the battle. The second rocket attack was on the Sendi. These rockets caused some shrapnel damage and pinned the AA crews but no mounts were damaged or destroyed. The third rocket attack was on the gun boat Saga. While small this ship has 10 25mm guns so was critical to the light AA defense of the convoy. Unfortunatly the rockets caused a fire to break out on the deck and rapidly spread. The confusion of damage control parties and the smoke kept this ship out of the battle for the rest of the action.
Overall this is a small sample size on which to judge. The fire is unusual but possible occuring 20% of the time.
As you know we have improved upone the englishman's to hit procedure as well. His process has divebombers too accurate particularly the western ones! 7 planes dropped their bomb. (they all dropped 1000lb bombs, for simplicity we ignored the 2 100lb bombs). 3 bombed the oiler with 2 hitting. The one that missed was the shaken pilot. 2 bombed the large MM with 1 hitting. 2 bombed a small MM with both hitting. I would expect a hit rate on a large MM of 60%. 5 hit out of 7 which gives us 70%. Close.
The first bomb that struck the oiler penetrated several decks causing significant structural damage. (about 25%). The second bomb that hit buckled the already weakened keel and caused a fire. The ship was 75% damaged and had lost most of its speed.
The next ship attacked was the large merchant man. The first bomb hit a 25mm AA mount aft and exploded. This destroyed the gun and crew but prevented more serious damage to the ship.
The next bomber to attack was destroyed by the Tone. The third missed.
The last ship attacked was a medium merchantman. The first bomb penetrated several decks causing significant structural damage (about 25%). The second bomb struck aft into the engine room causing significant damage there and causing the ship to come to a complete stop.
Immediately after the US attack the oiler was burning as was the PG Saga. The large merchantman was superficialy damaged and a medium merchantman was significantly damaged and dead in the water.
Overall the results were realistic. They do show variation but this takes into account variables such as where the bomb hits; does it penetrate ect. It takes some time but definitly adds flavor to the battle.
Lastly the Fate Of Ships table was consulted. The oiler sank. The fire on the Saga was put out with only minor damage. The medium MM through heroic efforts of her crew managed to start engines and limp to port with about 33% of her cargo intact. She will not return to Japan however.
In conclusion it must be stated that we lost this battle with a minor loss. Our oiler did not reach the Philippines. The devils lost 4 SBDs and we had a large MM and 1.33 medium MM get through but it was not enough to claim victory. The english system of BTH 2 with our vast improvements added to it is a great system that does produce a fun and reasonably historically accurate portrayal of air sea combat in WW II. Most importantly it will give us the detail to brag about our final victory over the west!!!
Cmdr Lee Gan
Great battle and I am now done with BTH 2 for a while! I am ready for some Platoon Forward Russian Front style next.
Thanks
Joe Legan


Sunday, May 9, 2010

Site not dead!

Capt Sandru making ace!!

Apologize for the lack of posting. A bussiness trip; real life and working of 2 projects for BTH 2 have kept me from playing any real games of late. Both projects should be in the Lardies summer special. The first is LAAF; simple anti aircraft rules for BTH 2. I have gotten some great help on this from Dan Nelson. The second is Bragging the Hun. It is more detailed damage tables for BTH 2 so you too can brag about your exploits back at the squadron bar! Ran 4 playtests this weekend including a particularly exciting one. 9 SBDs against 2 Tone class cruisers and 2 Japanese DDs. 1 SBD shot down by flak ( as expected) 6 of 8 SBDs hit their targets ( higher than expected but I am not messing with the to hit tables) First cruiser had a fire start/ 50% damage and had a 5 in turret destroyed. Fire burned out of control and gutted the ship. Had to be towed home! Second cruiser had bad flooding and heavy casualties. Flooding took a while to control and cruiser ended up limping home towing the first cruiser. Not bad for 8 SBDs!
Only real battle I have played was with my IAR -80 sq. Capt Sandru did make ace by downing 2 IL-2s while 6 IARs were flying CAP over a german TB and 3 Mine sweepers that had just delievered supplies in the Black Sea. They were attacked by 10 IL-2s escorted by 3 Yak-1s. Cpl Forscu was killed. Only one bomb struck home on the torpedo boat doing some minor damage. Flak scored no kills.
Next weekend I hope to have time to either play a russian front battle or a BTH2 battle with some corsairs I am currently painting up.
Till then thank you
Joe

Wednesday, April 21, 2010

Ethiopian training excercise 1935

Before Sgt Bustamanti and platoon fought a guerilla war in Ethiopia they participated in it's liberation. This comes from the opening days of the war and shows how Buffo gained his reputation and loyalty of his men.
During the Italian invasion roads were important for the attacker for supply. Despite the Ethiopian disdain for defensive combat their Turkish and Belgian advisors convinced them to construct defensive works to stop the aggressors.

As Lt Chianti walked up to Capt Butro he already knew what had happened and what his platoon would be asked to do. He had heard the firing up ahead as the column had stopped. He was thrilled that the Capitano was trusting him to re open the road from whatever rabble was blocking it. He believed in Italy and a new Roman empire. He was hoping some of the glory would rub off on him!! His mind snapped back to what the Capt was saying. "We have a tank and a sahariana to support you. We will also give the trees and the hill a drubbing with artillery before you go in. I suspect this will be much like a field excercise. Good Luck"

Characters:
Lt Chianti Romantic gr II
Sgt Buffo Bustamanti confident/ family 1st squad Gr II
Cpl Petracela cultured asl Gr II
Sgt Polti obnoxious 2nd squad Gr I
Cpl Riccelo Cheap asl Gr I

1 Platoon 1 45mm mtr 1 MMG 1 L3 tankette 1 sahariana jeep 2 stonks of 75mm arty with more on call if you need it


Looking from Italian positions
column took fire from trench in trees
black markers are suspected positions
WHAT IS YOUR PLAN LT??? WHAT IS YOUR PLAN MAD PADRE??
Lt Chainti decided subtlety was not needed here. He sent one squad to the left of the road and one to the right. The tank would go down the middle with the jeep swing wide right to pin down any forces in the building.
The artillery hit the trenches in the trees and shocked the wahlas. The artillery fell short of the hill and a MMG opened up from that position.
Initial advance

Buffo's squad quickly gaining the trees
Buffo's men moved smartly and gained the trees before the Wahlas recovered. There they traded shots with the savages.
On the right the MMG slowed 2nd squad greatly causing casulaties. Then it stopped! (broke) Polti rallied his folks with LTs help and moved up.
Sgt Polti's squad gains postions in front of
the hill with difficulty (nice jacket)

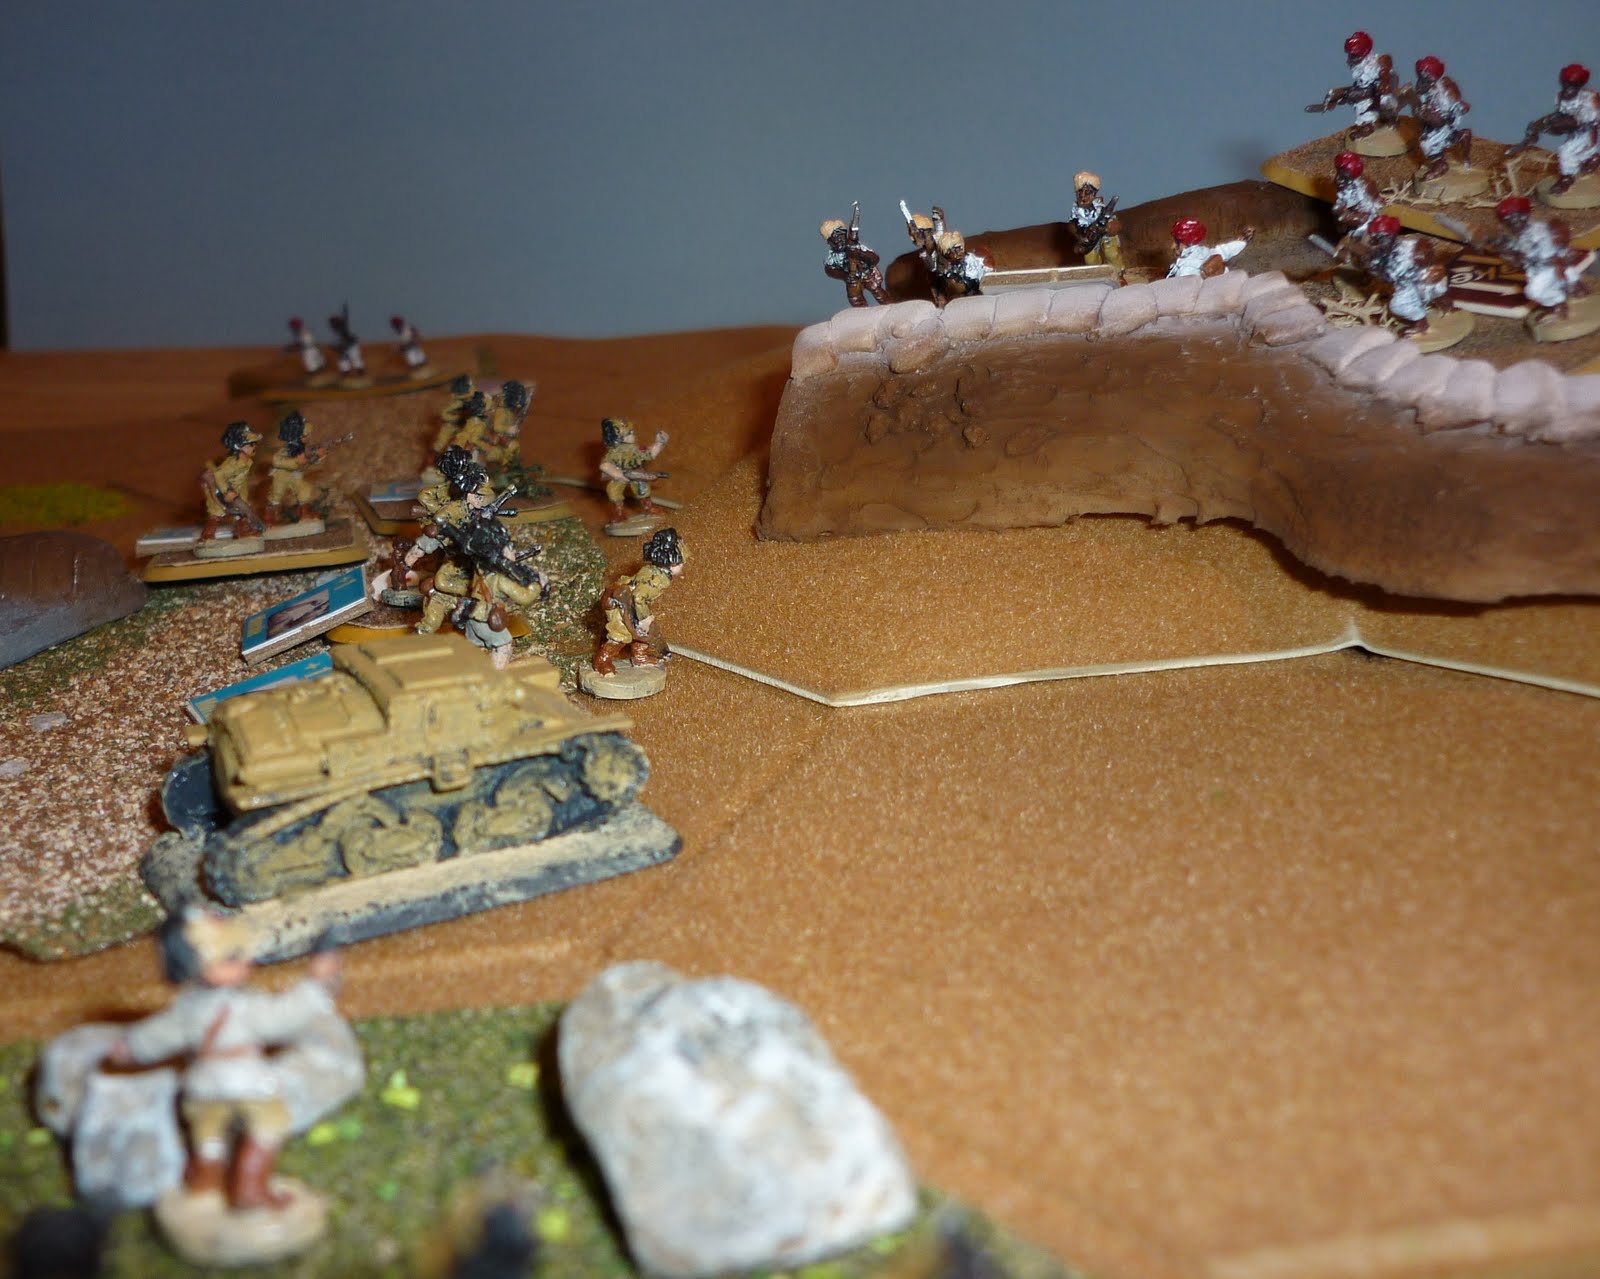
At this point Buffo led his men into the trenches to avenge their grandfather's defeat in this country years ago. The Ethiopians rose to the challange. At last, combat worthy of a warrior!
Combat worthy of warriors!
Buffo in the center
Buffo's leadership and skill carried the day as 5 of the 8 warriors fell with the rest retreating. The survivors moved to the hill where they were rallied by their officer. Buffo moved to flank them but warriors appeared on his left. ( they had moved from the building around the hill to flank Buffo) to make matters worse the MMG started up again and 2nd squad was taking heavy casualties. The Italians were pushed back.
At this point Capt Butro appears with a forward observed. After talking with Lt Chainti it was decided to pound the hill and then have another assualt led by Buffo.
Artillery pounds the hill
Yes, that is a french gouimer MMG! Sorry

The final assault. Even the tank gets
into the act
Buffo's men charge up the hill as smoke still hangs in the air. The fighting is furious but Italian elan carries the day! The Ethiopians, defeated but not broken retreat up the road. 1st squad is too exhausted to pursue; some training excercise!
Great game! At first it looked like another Italian blowout with Buffo gaining the trees and the MMG breaking. After the 1st trench cleared the Ethiopians stabalized as the MMG came back on line. I actually called it a draw as the Italians took a long time to clear the road and took 11 casualties.
Ethiopian forces
3 "squads" 1 with a LMG
1 MMG
1 Gr III officer 2 Gr II NCOs and 1 Gr I NCO
1 pre plotted 75mm artillery strike. Don't need to pre plot turn just location. (Someone will send out a signal that says "fire it now")
Forces set up dug in
the asl for 2nd sq was killed during the assault. He will be replaced by Cpl Fan. Lt Chianti tried to get Sgt Polti replaced and was unsuccessful. 2nd's squad's morale went down after the battle. He has decided to swap Sgts and give Polti the better squad and Buffo the worse one. We will see how the squads react! Buffo was praised by all for his bravery and elan. He met the CSM of the battalion and he earned his Grade III rating.
Enjoy
Joe


Thursday, April 15, 2010

FAAR defends Lardinski bridge

No platoon forward this week as I have been playing BTH2. I really like this game. I have also been testing some flak rules and some bombing tables that will hopefully be in the summer special if Nick and Rich run out of stuff to print!
Started my Romanian ME 109G squadron. In two missions they have 4 kills and have lost 3 planes. Personnel losses have been 1 KIA, 1MIA and 1WIA. They have 1 Cool Point. [ the goal in Squadron Forward is to obtain cool points thus becoming the envy of friendly squadrons and infamous to the enemy ones. This also allows you to pick up women I am told!]
Their leader board:
Lt Florescu 2 kills Yak 1m
Lt Ancu 1 Kill P-39
SLt Marulis 1 kill shturmvik

First mission was a fighter sweep where they were bounced by 6 Yaks.

On the wrong side of the bounce! Adj Sef Mirou and
Adj Ursuche (MIA) both be shot down
Lt Florescu getting one of his two Yaks
The second mission was 4 ME 109Gs defending Lardinski bridge against 2 P-39s and 6 Shturmviks. They didn't fair particularly well losing Slt Gulan when his plane exploded. Adj Burileanu is a rookie, quickly lost his formation and became wounded. He managed to bring his plane back but the CO, Capt Selei, is very unhappy. 1 P-39 downed and 1 bomber. They didn't loose cool points due to lousy bombing with only 1 250lb bomb hitting the bridge doing light damage.
Melee near the bridge

Russian bombers thwarting my efforts at
testing the new bomb damage charts!
[Rockets worked well at the flak though]
I also have a P-47 sq in europe, a P-38 squadron in the pacific, a wildcat sq and a Tommahawk squadron in the Med running.
Lt Jablowski failed to Bag this Hun

However this Jap is in the bag!

Japanese get revenge
Again abysmal bombing thwarts my in game testing. [no I am not tinkering with the to hit tables, just bad die rolling] 1 bomb does damage at the airfield. However, that bomb hits the fuel dump so bullseye!@
The rules are actually done. Now I just have to write them up pretty.
Plan to have an Italian attack on the Ethiopian army this weekend
Joe


Monday, April 5, 2010

Dawn Raid Ethiopia 1938

My Italian platoon in East Africa holds a special place. It was with this platoon that I started the whole concept of platoon forward. I was inspired by Chris Stoesen's East Africa suplement and Max Maxwell had a colonial article in the Lardie special. I started focusing on a single individual, Sgt Bustamanti and it has evolved from there. I digress...

For once I hope we have good intellegence thought Lt Chianti. Supposedly rebel leader "honest Abe" had gotten his hands on a french 2pdr. The plan was to cross the river at dawn, raid the hideout and capture the gun before the Wahlas could figure out how to set it up. It would either be in one of the buildings or a cave near the river. Mula Tono felt Abe would have no more than 30 men at the hideout. Capt Butro would be north of the river with a blocking force if things went poorly.

Characters
Lt Chianti Romantic Gr II
Sgt Bustamanti cheerful 1 section Gr II
Cpl Petracela ast SL cultured Gr II
Sgt Polti obnoxious and anti war 2nd section Gr I
Cpl Riccelo asst SL Cheerfulll Gr I

Italian platoon consists of 2 sections of 19 men each. 10 man assualt element and 9 man LMG support element containing 2 LMGs I rate the breda LMG as only earning 2 dice.

Map looking across the river
River fordable only at both ends
Note MMG on hill far right
Lt Chianti was going to take Polti's section across the left ford which was the easy one to cross. He was going to position the MMG and light mortars on this side of the river to fire at the main building where he figured the main resistance would be. Sgt Bustamanti would cross on the right. Sweep the cave and move towards the buildings. Speed was essential if they were to capture the cannon!
Sentry at dawn not very watchful
Lt Chianti got half the section across before the sentry fired a warning shot to wake the rebels. He led his men forward towards the big house. Suddenly from the doorway of the courtyard...
Rebel with Italian LMG
Machine gun fire from the building caused his men to scatter. He rallied them as mortar shells rained down on the building. Sgt Polti finally showed up. Lt Chianti stood up, raised his pistol and yelled "Avanti!" as his men charged the building. The rebels melted out into a field behind the building. Chianti quickly searched the building but no cannon.
Sgt Bustamanti runs into trouble at his crossing
MMG fire greeted Sgt Bustamanti as his men forded the river. As he moved back Wahlahs appeard out of the cave. Cpl Petracela's LMGs quickly sent them packing. Buffo knew he had to get across the river fast; MMG or not. He ordered his men forward and they obeyed. The MMG strangely fell silent [ jammed and was never fixed!] They were across!
Now they started trading shots with the rebels but their LMGs told the tale as the rebels fell back
Sgt Bustamanti nearing the cave entrance
As his troops neared the cave they saw 3 mules leave the cave burdened with metal objects. The cannon! Stop the mules men, he directed
Lt Chianti also saw the mules and went sprinting after them through the field. The demoralized bandits put up little resistance when surrounded by Mussolini's finest
Mules surrounded (They just look like a german shepard)
Lt Chianti in the field with pistol raised
4 rebel prisoners were taken along with the cannon. Lt Chianti gave report of the triumph personally to LtCol Aquino who was quite pleased! The only mark on the day was "honest Abe" was not among the 20 men encountered.
Good game but everything broke the italians way so it was quick. They forded the river easily and quickly. The MMG jammed turn 2 and was never cleared. The rebels (freedom fighters) never rallied their LMG team even though they needed a "8" or less on 2 dice. Lastly, for the first time my system of generating forces let me down. The rebels generated only 1 "squad" with a leader so I added a second squad and leader. I think I will play this scenario again with my vietnam troops and see if it is any closer. I didn't think the Italians would ever be on the winning side of a blow out!!
Italian Forces
1 Platoon plus 1 MMG and 1 45mm Mtr
Ethiopian Forces
1 Gr III leader, 1 Gr II leader
1 squad with italian LMG, 1 squad of 10 warriors
1 MMG which must set up on the far hill. It is covering the likely approach of the Italian forces
Special rules
Rebels may place a sentry near the main building. Both squads must deploy in either buildings or the cave which in the north end of the hill nearest the river. The cannon must also be in one of these 3 locations. It is disassembled.
Every turn the freedom fighter roll a d6. When the cumulative score reaches "10" the mules are packed with the cannon and can move. They will move 3 hexes [ 60yards]each turn. If they make it off the north edge of the board the Ethiopians win. If the Italians capture the cannon they win.
When the Italians cross the right ford they do so easily on a die of 1-3. A 4-6 means their intel was faulty and it will be difficult taking a whole turn in the river to ford.
If you have read my morale rules in the latest Lardy special I suggest you use them for the Italians. I set their morale level at 14. The Ethiopians ignore morale as they have to move their cannon at all costs.
Enjoy
Joe


Sunday, March 28, 2010

Patrol along the Kokoda Trail

This is the 3rd battle with my aussie platoon. Lt "Pinky" Seibert was wounded last battle and has not been replaced. He will miss 2 battles. This platoon has poor leadership with 2 Gr I leaders and the platoon sgt a gr II [McDonnel] who was just promoted to Sgt after last battle. The company commander has decided to send the Sergant Major out with 2 sections on a combat patrol.

Sergant Major, your map is below. You start at the bottom edge and must recce the whole board. Come up with your route and order of march. You have 2 sections plus a 2in mortar.
See what the Japs are up too and good God man, be careful!
Characters:
Sgt Maj Peters Gr IV
Cpl Tommy Higgins 1st section Gr I
Cpl Jeffrey Stokes 2nd section Gr I hesitant commander

Sgt Major decided to start along the left of the board, skiriting the jungle and make a clockwise circle of the board going around the rocky hill. 2nd section would lead and when contact was made he would move up to help Stokes who was the weaker of the 2 weak leaders.

Map depression is left and
rocky hill is left center
Cpl Higgins was glad to be on a mission with the Sergant Major. Hopefully he would see what an idiot Stokes was and how deserving he himself was of another stripe. Higgins was sadden when 3rd section's Cpl McDonnel was promoted to platoon Sgt. McDonnel was good, just not as good as himself. He was out to prove it to the Sergant Major today.
Unfortunalty for our heros, the japanese [also on patrol] saw them first and moved to set up an ambush...
Sgt Maj Peters sees Japs on the hill
and past the jungle
The Sgt Maj called out Japs on the hill and past the jungle! He ordered Higgins to take his section into the jungle and Stokes into the Kunai. 2in mortar was to start pounding the hill.
Japanese knee mortars in
my version of bamboo
Japanese squad on hill
Higgins got his folks into the jungle and started firing at advancing infantry. Unfortunatly a LMG from the hill and mortars pounded his position and the men waivered.
Meanwhile a second LMG opened up on first section from the hill.
Japanese advance on Cpl Higgins
Cpl Higgins had to pull back into a depression before they were overun!! Why wouldn't these bastards rally!!!! [ It is tough to be a Gr I leader]
Meanwhile, 2nd section had pinned the LMG on the hill. Sgt Maj screamed, up and at em boys!
Up and at em boys!
The aussies took out the LMG but before they did a final burst caught 2 men in the stomachs. Sgt Maj Peters hit the ground knowing it was bad. An IV was started; he refused morphine knowing he was the only competent leader but then he lapsed into uncounsouness. Cpl Stokes was at a loss at what to do next. [The hesitant commander card came up at the worst times] They had lost 4 of the section taking out the LMG. There was still a jap squad on the hill. They traded shots and even repeled an assault. Stokes could not get them rallied to charge and could not un hesitate enough to have them retreat.
Cpl Higgins in the depression
Meanwhile, Cpl Higgins could not get his section to rally! The japanese gathered for another charge.
The final charge
2in mortar shells try to halt the advance
12 Japanese led by a sword wielding NCO moved into the depression.Cpl Higgins managed to get extricate his folks without losing a man. He then went back and picked up the the 2in mortar and quitely snuck away.
Casualty wise it was a closer battle with the aussies sustaining 14 and the Japanese 8. Clearly the Aussies were driven from the field. With 2 poor leaders they could not rally their folks. 2nd section finally got away when Cpl Stokes was wounded. Had the Sgt Maj not been wounded it might have proved a very differnet game.
Japanese forces:
1 gr III leader 1 gr II leader 1 gr I leader
2 squads with LMGs
1 knee mortar squad [3 mortars and 6 riflemen]
Enter north edge of board on patrol Randomly determine edge and turn of entry
Cpl Higgins was unsuccessful in having Cpl Stokes removed from the platoon and he had a 50/50 chance of becoming a Gr II leader and missed. Sgt Major Peters lived but was invalided home to australia. The new Sgt Major is Joe Cook and he already dislikes the platoon. Lt Seibert is working at battalion was convilesing and had done some good stuff for the company that has earned the gratitute of the company commander. Cpl Stokes is out for 2 battles and Pvt Collins will have the section Gr I no hesitant commander card.
Can Sgt McDonnel whip these guys into shape? Will Cpl Higgins ever earn his Gr II?
Enjoy
Joe


Sunday, March 7, 2010

First sortie for Adj Sef Ionescu

Traded in my playtest copy of Bag The Hun II for the final. Great artwork and some inspiring rules! Rivet counters won't like them but they reward good tactics and show why a veteran pilot is always dangerous. Needless to say did not play Platoon Forward this week but a bit a good news on that front. Rich of Too Fat Lardies has agreed to pubish it and stated he will do so right after he finishes Charlie Don't Surf. I expect to see it this summer. Soon you will be inspiring me with your tales of heroics!!

Still tinkering with Squadron Forward and my Romanian Air Force...
Adj Sef Ionescu had been in the AAR for 9 years and had finally wrangled a combat assignment when his friend (wingman) was posted as the wing commander of a fighter base at the start of the war to rid the world of Communism. If you read the last post you will remember the escadrille was down to 4 planes. The mission assignment today was a fighter sweep. Lt Macri would lead the mission along with the flight sergeant. The 2 wingmen would be Adj Stag Toma and Adj Baciu.
Characters:
Lt Marci Plesant
Adj Sef Ionescu Cultured Veteran pilot
Adj Stag Toma obnoxious
Adj Baciu cunning 1 kill

Shortly after takeoff Lt Macri had engine trouble and had to abort. (random event) There was discussion of cancelling the mission but Ionescu felt strongly that they should at least stay over Romanian lines and protect the troops. He was spoiling for a fight!

3 IAR-80s in a loose "V"
The blue stand denotes veteran pilot
(You can get away with that solitaire!)
"Bandits 4 o'clock low" Toma calls out. Obnoxious on the ground, Toma was a fine wingman in the air and his eyesight had prevented a bounce today! 5 I-16s. Ionescu pulled the V around right and allowed Baciu to detach as the battle was joined! (Toma had complained that he was senior but in the air performace counted and Baciu had downed a plane.) The battle is joined
A swirling dogfight ensued with the IARs using their speed to accelerate out of trouble when needed. Toma Lost Ionescu early on (on purpose?) as Ionescu dove and quickly turned hard to port to get on the tail of an apparently lost (sprog) I-16. As his machine guns rattled he saw hits in the cockpit of the small fighter. [ Using a modified version of my damage table that appeared in a Lardie Special a while back; the I-16 had back seat armor which turned the damage roll from a temporary loss of control to a cockpit glass smashed result; curses!] The startled pilot throttled down, flipped the agile rata into a left turn that Ionescu could not quite follow. He lost airspeed pulling Gs and dropped a level of altitude to aviod a stall.
Meanwhile...
3 I-153s show up to party

A random reinforcement brings 3 more russian aircraft into the battle. 3 against 8! Baciu is quickly shot down but bails out unharmed. Adj Sef has seen enough. He tells Toma they have to retreat!!

Sound retreat! Toma on the tail of a I-153 upper left
Adj Sef Ionescu swinging wide of his prey middle right
Adj Stag Toma pulls the trigger as the I-153 fills his sights. He sees hits on the engine and then the plane explodes in a ball of fire! Joyously he dives for the deck and heads for home. Adj Sef thinks, "There will be no living with him after this."
Enjoy
Joe