Long weekend so got three games in: a game of SAGA, small game of Donnybrook and a game of WW II Donnybrook. Am working to see if I can come up with a tactical system that I like better than Lazy TW&T. So far it is promising. If a soldier is hit you roll to see if he is pinned or KIA. Once the unit has 33% of its forces pinned the whole unit is pinned. I have tweaked morale as well. So I needed a platoon to try my new system on and decided to use my desert rats. (Platoon Forward hasn't changed and will be used with this new system as well.) They are not a great platoon but they constantly win games. They have a new Lt who is still figuring things out but the platoon Sgt (Smith) has really caught fire as of late and was promoted to a level II leader after leading a counterattack back into a fort last battle. 3rd Section has been a problem since they got clobbered at the beginning of the war and lost 4 men. They developed a reputation as a hard luck section that they can't seem to shake. There morale is down one making them raw for our purposes.
I rolled up "counterattack" which is a scenario I haven't played in ages. It is a fun one as it is designed to be a cavalry to the rescue type.
The Italians were attacking towards Tobruk. SLT Audley's company was held back in reserve in case they made headway. Maj Barns, the CO, called the platoon commanders in. "The Italians are attempting to cross the Wadi Ashor and are making good progress. We have been tasked with stopping them. Johnny, you have lead and I am coming with you."
SLT Johnny Audley (d10) cheap/ arts Gr I military
Sgt Johnny Smith (d10) optimistic/ position Gr II
Cpl Egg Soutcote (d10) conformist/wealth Gr II
Cpl Joey Crocket (d8) fanatic/ skirt chaser Gr I
Maj Thomas Barns (D10) course/ government Gr II
1 Matilda tank and 1 MMG led by Sgt Tubbs.
The Desert Rats arrive! 1 section with Sgt Smith entering from the left. Italians have turned the british right flank and have a LMG in the house facing the street. They are also preparing to cross the Wadi. A 2 pdr AT gun guards the bridge, all that is left of the defenders.
Valiant defenders!
Sgt Smith moves up the road and attracts LMG fire! 1 down and 1 pinned (shown by the rock)
SLT Audley moves the bren team into the Mosque and starts to fire at the LMG. Sgt Smith rallies his man and moves right towards the house.
The Italians make a move over the bridge! SLt Audley shifts fire to the bridge and the Italians pull back leaving two on the bridge.
Maj Barnes orders 3 section over to the small fort behind the AT gun. MMG up to the mosque and 2 section in reserve. The Matilda fires up hte road at the LMG.
Maj Barnes in the olive grove with the MMG and 2in mtr. ( No pansie tropical dress for him!) You can see 3 section NOT moving behind them. (notice large pin marker)
Meanwhile Sgt Barnes close assaults the LMG (took some rule writing. How many dice does a LMG get?) Two Italians fall and the other two flee with their officer. Sgt Barnes loses no one. The Italians lick their wounds.
Maj Barnes is annoyed that 3 section has not moved. (Bad card draws.) He decideds to go have a word with young Cpl Crocket.
More frightened of the Major then the bullets the men respond.
The Italians start one last push!
The two tanks exchange fire. The Italian shell bounces off harmlessly. The Matilda misses. SLt Audley orders 2 section around the right flank to mop up the Italians.
Egg moves up the hill and the disrupted team (celtic cross marker) leaves before he can engage.
With that the Italians leave the field.
Short game that was pretty one sided. The Italians rolled horribly. Donnybrook worked well and it was fun. Post game Maj Barns was upset with Joey Crocket but did not sack him (yet). The morale of 3 sectin stays bad. Joey goes and gets himself sick (as a skirtchaser maybe VD?) and will miss the next mission. Will have to have a Pvt lead the section. If he does well that will probably be the end of Joey.
For those of you that want to try this at home the Italians that were generated were
1 half platoon led by a Gr II officer and Gr I leader. the Gr I leader is hesitant. the half platoon is actually elite (d10) due to a pre game event.
1 half platoon led by 2 Gr I NCOs
1 M13/40 tank
1 MMG as a reinforcement
A half platoon is 10 rifle men and an 8 man LMG section containing 2 LMGs. I rolled a D3 and subtracted that number of men from both half platoons as casualties before the desert rats got there.
Enjoy
Joe
A site for stories of my platoons using the solitaire campaigne system Platoon Forward. "War is a drama, not a game of chess." Gen Eisenhower
Welcome to Platoon Forward!
Welcome to the site where the story of the battle is as important as the battle itself. Here we will focus on men thrust into extraordinary situations of life and death. They must lead other men with duty and honor to meet their countries objectives. Some will be blessed with great skill, some will carry great shortcomings. No matter what nation, no matter what war, no matter what theater, they are all called to move their Platoon or Squadron forward!
These are their individual stories as played out using my various campaign rules . Hopefully these stories will entertain and inspire you to use your own troops, airmen and sailors to accomplish your own great heroics.
Tuesday, May 27, 2014
Thursday, May 22, 2014
VIPs from Greece
Sorry for the long delay between posts. We are getting ready to leave England so doing as much final traveling as we can! Last day on the island is 3 July then back home to Virginia! Have really enjoyed it here and will miss the people and the history. Will not miss the weather or the cost of living! [ weather has been gorgeous this last week though]
Have played one game of Donnybrook, one of WW II Donnybrook and two of Release the Hounds with Flotilla Forward. Release the Hounds is done as my new 2D6 system works well with big ships including cruisers. Flotilla Forward continues to mature as well. Here for your reading pleasure is my last RtHs.
Cdr Clarkson was daydreaming in his cabin aboard the HMS Juno when a message came in. His CO, Capt Rawling, wanted to meet him aboard the HMAS Australia in 1 hour. " What the devil could this be about?
" he wondered. The Captain had complimented Clarkson on his handling of the Juno the week before when the flotilla had run into 4 Italian DDs. Could this be something exciting?
An hour and a half later they were ushered into a conference room aboard the Australia and all was reveled. The war was not going well for the Anglo-Greek alliance on the mainland. As a precaution, some national treasures (and people) were to be loaded onto the HMAS Australia tomorrow and taken to London for safe keeping. This was to be a quiet operation for fear of the morale affect. Two destroyers were required to accompany the cruiser for protection. Capt Rawling had selected Cdr Clarkson to be the destroyer SO with the Juno. Clarkson was delighted with the news! Cdr Smith in the Jersey was senior to him and should have had the assignment. He couldn't wait to tell him.
Characters
Cdr Clarkson Evil/ govt mil Gr II
HMS Juno Crew II Avg
LtCdr Anston position/ religion Gr II
HMS Jaguar Crew II Avg
HMAS Australia with its Captain Crack
[ I rolled up a special scenario that was a "transport mission with 1 additional ship added." That was the genesis for this scenario!]
The British force moves out!!
Something to be said for a 1/1200 scale CL !!!
[ I know it isn't the Australia but it is the only British CL I own.
Which ship is it? ]
The British load their cargoes without interference [60%] and sail west. The Australia is having trouble with one of her propellers and can only make 25 knots max. [ cool random pre game event!] That night LtCdr Anston picks up 3 ships 3 miles straight ahead on radar. The Capt orders a hard turn to port to avoid the contact.
Visual contact made between the HMS Juno [center] and 3 Italian DDs at just under 2 miles.
The Capt orders Ldr Clarkson's DDs to engage enemy while HMAS Australia disengages.
This leaves the Juno against 3 Italian DDs while the Jaguar moves to position.
Clarkson fights with fury and heavy damages the lead Soldati class DD but the Juno is damaged in return. He fires 5 torpedoes but they miss. He turns away after the Italians fire their own torpedoes but one hits home at the stern. The engine room is destroyed and the Juno is doomed!
Jaguar center moves up to engage the Italians on the left. The Australia opens fire thereby subjecting itself to fire. The Juno [bottom center] starts to sink.
The HMS Jaguar takes on the Italians! 5 torpedoes launched at a Soldati class DD. One hits home and LCdr Anston evens the score with the Italian starting to sink.
HMS Jaguar tangles with the two Italian DDs while HMS Australia lends support while retreating away. The damage starts to mount and Jaguar's steering is damaged.
Toe to toe with Eitey!!
[ In RtH there are 4 classes of damage- 1- damaged. 2- Heavily damaged 3 Wrecked and 4 sinking plus a myriad of critical hits.]
LCdr Anston fights to give the Australia time to flee with her valuable cargo. The Italians line up for torpedo runs on the CL. As you can see the Jaguar is now wrecked.
The last 3 torpedos are launched! Each hex for this game is 333 yrds as opposed to 200 yrds for my coastal games. The world holds it's breath ( well okay maybe not the WHOLE world) and they miss.
It is clear now to the Captain on the HMAS Australia that they are facing 2 Italian DDs. It is also clear that HMS Jaguar is in trouble. He does not know if the Italians have any more torpedos. He also doesn't know if there are any more surface forces lurking about. He also must make time before daylight and axis aircraft appear. But to run from two DDs and leave Jaguar? Decisions decisions! What would you do? I decided that almost any british captain would fight. The next turn I rolled a wonderful random event called "independent action". Here one of your ships takes independent action within certain parameters. I rolled on the table, added my modifiers and got " open distance to the enemy". Wow; there was my answer. So the HMAS Australia pressed on with the mission and the Jaguar sucomed to gunfire.
Great game with an interesting ending. Post mission I rolled on the AKOT table and the Admiralty found the Captain had done the right thing. Capt Rawling felt otherwise. Cdr Clarkson and many of both ships were picked up the next day by Italians and taken POW. LtCdr Anston was unfortunately Lost at Sea.
LCdr Jewett of the damaged HMS Jackal managed to tick off the chief of maintenance, Lt Rocker, so his ship is not ready yet. The squadron loses another reputation point since they lost two DDs to the Italians 1. Due to their acute shortage of ships the Admiralty sends them the HMS Kingston, LCdr Walsh commanding. Should be interesting!
Enjoy
Joe
Have played one game of Donnybrook, one of WW II Donnybrook and two of Release the Hounds with Flotilla Forward. Release the Hounds is done as my new 2D6 system works well with big ships including cruisers. Flotilla Forward continues to mature as well. Here for your reading pleasure is my last RtHs.
Cdr Clarkson was daydreaming in his cabin aboard the HMS Juno when a message came in. His CO, Capt Rawling, wanted to meet him aboard the HMAS Australia in 1 hour. " What the devil could this be about?
" he wondered. The Captain had complimented Clarkson on his handling of the Juno the week before when the flotilla had run into 4 Italian DDs. Could this be something exciting?
An hour and a half later they were ushered into a conference room aboard the Australia and all was reveled. The war was not going well for the Anglo-Greek alliance on the mainland. As a precaution, some national treasures (and people) were to be loaded onto the HMAS Australia tomorrow and taken to London for safe keeping. This was to be a quiet operation for fear of the morale affect. Two destroyers were required to accompany the cruiser for protection. Capt Rawling had selected Cdr Clarkson to be the destroyer SO with the Juno. Clarkson was delighted with the news! Cdr Smith in the Jersey was senior to him and should have had the assignment. He couldn't wait to tell him.
Characters
Cdr Clarkson Evil/ govt mil Gr II
HMS Juno Crew II Avg
LtCdr Anston position/ religion Gr II
HMS Jaguar Crew II Avg
HMAS Australia with its Captain Crack
[ I rolled up a special scenario that was a "transport mission with 1 additional ship added." That was the genesis for this scenario!]
The British force moves out!!
Something to be said for a 1/1200 scale CL !!!
[ I know it isn't the Australia but it is the only British CL I own.
Which ship is it? ]
The British load their cargoes without interference [60%] and sail west. The Australia is having trouble with one of her propellers and can only make 25 knots max. [ cool random pre game event!] That night LtCdr Anston picks up 3 ships 3 miles straight ahead on radar. The Capt orders a hard turn to port to avoid the contact.
Visual contact made between the HMS Juno [center] and 3 Italian DDs at just under 2 miles.
The Capt orders Ldr Clarkson's DDs to engage enemy while HMAS Australia disengages.
This leaves the Juno against 3 Italian DDs while the Jaguar moves to position.
Clarkson fights with fury and heavy damages the lead Soldati class DD but the Juno is damaged in return. He fires 5 torpedoes but they miss. He turns away after the Italians fire their own torpedoes but one hits home at the stern. The engine room is destroyed and the Juno is doomed!
Jaguar center moves up to engage the Italians on the left. The Australia opens fire thereby subjecting itself to fire. The Juno [bottom center] starts to sink.
The HMS Jaguar takes on the Italians! 5 torpedoes launched at a Soldati class DD. One hits home and LCdr Anston evens the score with the Italian starting to sink.
HMS Jaguar tangles with the two Italian DDs while HMS Australia lends support while retreating away. The damage starts to mount and Jaguar's steering is damaged.
Toe to toe with Eitey!!
[ In RtH there are 4 classes of damage- 1- damaged. 2- Heavily damaged 3 Wrecked and 4 sinking plus a myriad of critical hits.]
LCdr Anston fights to give the Australia time to flee with her valuable cargo. The Italians line up for torpedo runs on the CL. As you can see the Jaguar is now wrecked.
The last 3 torpedos are launched! Each hex for this game is 333 yrds as opposed to 200 yrds for my coastal games. The world holds it's breath ( well okay maybe not the WHOLE world) and they miss.
It is clear now to the Captain on the HMAS Australia that they are facing 2 Italian DDs. It is also clear that HMS Jaguar is in trouble. He does not know if the Italians have any more torpedos. He also doesn't know if there are any more surface forces lurking about. He also must make time before daylight and axis aircraft appear. But to run from two DDs and leave Jaguar? Decisions decisions! What would you do? I decided that almost any british captain would fight. The next turn I rolled a wonderful random event called "independent action". Here one of your ships takes independent action within certain parameters. I rolled on the table, added my modifiers and got " open distance to the enemy". Wow; there was my answer. So the HMAS Australia pressed on with the mission and the Jaguar sucomed to gunfire.
Great game with an interesting ending. Post mission I rolled on the AKOT table and the Admiralty found the Captain had done the right thing. Capt Rawling felt otherwise. Cdr Clarkson and many of both ships were picked up the next day by Italians and taken POW. LtCdr Anston was unfortunately Lost at Sea.
LCdr Jewett of the damaged HMS Jackal managed to tick off the chief of maintenance, Lt Rocker, so his ship is not ready yet. The squadron loses another reputation point since they lost two DDs to the Italians 1. Due to their acute shortage of ships the Admiralty sends them the HMS Kingston, LCdr Walsh commanding. Should be interesting!
Enjoy
Joe
Friday, March 21, 2014
Prisoner rescue in Tangiers
Sorry for the long break in posts but the weather has been so good in England that we haven't spent much time at home on the weekends. Weekdays are busy with work, daughter's sports and painting up americans for my AWI battles I have yet to fight. Have played several BTH games and this game of DonnyPractice. It takes its inspiration from a Dave O Brien scenario about rescuing prisoners from a slave market in Tangiers. I don't have those kind of figures so I made due.
"Prescot! We have recieved word that the notorious, pirate HR Block, is meeting with Abdulla Jack 5 kilometers south of town tomorrow. HR is going to sell some prisoners he has reciently captured. Take a platoon down there and break up the party and free those prisoners. Better yet capture HR in the process. If you want a promotion capture HR and Abdulla Jack! Ensign Selfridge will be joining you with some marines. Good Luck old boy."
Lt Prescot D10 Gr II leader
Cpl Tennison D 8 Gr I leader
16 drilled infantry with drummer
Ensign Selfridge D 10 Gr II leader with 6 elite marines. Comes in on first British reinforcemtn card
The prisoners await their fate!
Lt Prescot's men moved down towards the building and split into two groups in order to keep the pirates from running off with the captives. Lt Prescot kept to the road and Cpl Tennison moved toward the courtyard. Lookouts spotted the redcoats and sounded the alarm. Arab calvalry moved to charge up the road while pirates manned the courtyard.
Pirates start to fire at teh advancing british. One Arab and one pirate guard the prisoners.
Meanwhile the calvalry take a toll on the british, severly wounding the Lt.
This is immediatly followed up by an infantry charge.
It is too much for the half platoon. They retreat towards Cpl Tennison.
The British make a stand as the Lt is bandaged.
Meanwhile british marines snipe at the pirates from a distance.

The arab infantry, buoyed with men from the town attack again! Lt Prescot, weak from loss of blood, rallies the men to the colors! The Arab's morale breaks but the cost in Englsih casualties is high.
Lt Prescot gathers the survivors of the platoon and moves them back out of the town while Arab calvalry look on. There will be no rescue today.
Great game that once again played fast. I tried a different save mechanism that I dropped halfway through the game because I didn't like it. This was the first game where muskets were not dominating and the enemy could actually close. Unfortunatly the british payed the price. Splitting my force was a mistake. I still like my command rules and use the morale and fire rules straight out of Donnybrook.
For those wishing to try it the enemy had:
Captain HR Block D 12 Gr II and 8 pirates. ( all have muskets) drilled
Abdulla Jack D 10 Gr II mounted
5 calvalry elite
Sergant D8 Gr I leader with 6 raw infantry
3 prisoners controlled by pirates. 1 is D6 raw if given the chance. All are unarmed. One bad guy can control all three prisoners.
5 elite calvary enter bottom of board on first draw of Arab reinforcement card
6 raw infantry and banner enter bottom of board on second draw of Arab reinforcement card
Enjoy
Joe
"Prescot! We have recieved word that the notorious, pirate HR Block, is meeting with Abdulla Jack 5 kilometers south of town tomorrow. HR is going to sell some prisoners he has reciently captured. Take a platoon down there and break up the party and free those prisoners. Better yet capture HR in the process. If you want a promotion capture HR and Abdulla Jack! Ensign Selfridge will be joining you with some marines. Good Luck old boy."
Lt Prescot D10 Gr II leader
Cpl Tennison D 8 Gr I leader
16 drilled infantry with drummer
Ensign Selfridge D 10 Gr II leader with 6 elite marines. Comes in on first British reinforcemtn card
LT Prescot enters from the top of the board. Prisoners held in the center courtyard while HR and Jack discuss bussiness.
Lt Prescot's men moved down towards the building and split into two groups in order to keep the pirates from running off with the captives. Lt Prescot kept to the road and Cpl Tennison moved toward the courtyard. Lookouts spotted the redcoats and sounded the alarm. Arab calvalry moved to charge up the road while pirates manned the courtyard.
Pirates start to fire at teh advancing british. One Arab and one pirate guard the prisoners.
Meanwhile the calvalry take a toll on the british, severly wounding the Lt.
This is immediatly followed up by an infantry charge.
It is too much for the half platoon. They retreat towards Cpl Tennison.
The British make a stand as the Lt is bandaged.
Meanwhile british marines snipe at the pirates from a distance.
The arab infantry, buoyed with men from the town attack again! Lt Prescot, weak from loss of blood, rallies the men to the colors! The Arab's morale breaks but the cost in Englsih casualties is high.
Lt Prescot gathers the survivors of the platoon and moves them back out of the town while Arab calvalry look on. There will be no rescue today.
Great game that once again played fast. I tried a different save mechanism that I dropped halfway through the game because I didn't like it. This was the first game where muskets were not dominating and the enemy could actually close. Unfortunatly the british payed the price. Splitting my force was a mistake. I still like my command rules and use the morale and fire rules straight out of Donnybrook.
For those wishing to try it the enemy had:
Captain HR Block D 12 Gr II and 8 pirates. ( all have muskets) drilled
Abdulla Jack D 10 Gr II mounted
5 calvalry elite
Sergant D8 Gr I leader with 6 raw infantry
3 prisoners controlled by pirates. 1 is D6 raw if given the chance. All are unarmed. One bad guy can control all three prisoners.
5 elite calvary enter bottom of board on first draw of Arab reinforcement card
6 raw infantry and banner enter bottom of board on second draw of Arab reinforcement card
Enjoy
Joe
Monday, February 24, 2014
Dog raid on a small Italian port
Allright, finally started getting tired of playing Donnybrook. Did try it with dark ages and it worked well. Both sides are evenly matched so a bit generic compared to SAGA but I can work on that by setting up characters.
A Saxon and Viking (D12) hero battle it out! Great fun that.
Also penned a humor article called "Confessions of a Dice Junkie" for WI and "Leadership Matters" a variant for SAGA for WSS. Guy at WSS is a nice person but pretty unreliable at answering stuff so I won't hold my breath for the SAGA article. I have almost finished "We got the Beat" my age of Sails variant that Jack has asked about. That should be off in 2 weeks.
Picked up Dog Boats at War by Leonard Reynolds at a used book store. What a great book! It covers the channel, Med and Norway and has a lot of scenario ideas. Am still tweaking my Release the Hounds rules as it is either perfect for MTBs or DDs. Think I found the solution. Roll 2D6s to even out the variance in the combat table but allow for the "big hurt". Also wanted to test out my sea to land rules. So pulled out my MGB flotilla in the Med and sent them against a small port on the island of Sicily using Flotilla Forward. This is only their second battle and their SO is not popular.
Lt Jones RNVR was happy to finally be raising some hell. There last several patrols had found nothing. Tonight his lads would stir up trouble like commandos! All they had to do was run along a port and shoot at anything in it! He could lay off the booze for that.
Lt Jones Haughty/ alcohol avg crew
Lt Van Heiss Naive/ revenge privlaged avg crew
Lt Peters Cheap / family poor crew
The target! 20mm guns on the quays. 2 37mms far left. 2 88mm far right.
Roll for ships in the harbor tonight. One coastal defense ship armed with a 37mm forward.
2 unarmed schooners and a small merchatman.
Dog Boats moving smartly. No random events on the way to target.
Despite visability being almost 2 miles Lt Jones gets to almost a mile before the Italians notice. ( It is late afterall!)
Surprise is almost total as the Dogs begin their run across the mouth of hte port. Tracers flash across the night sky bringing calling cards of death and destruction.
After their run the patrol boat is wreaked and the merchantman is on fire!!!
Lt Jones decides, with only light damage to his own forces, to pass across the entrance one last time. He is tempting fate to accomplish even greater feats. Lt Van Heiss, bent of revenge, couldn't be happier. Lt Peters, is not so sure, but falls into line.
The British do silence one gun on the quay, destroy a truck and damage a schooner but the 88s start to find their mark. Lt Jones' boat is hit causeing engine damage and Lt Van Heiss' boat sustaines a near miss. Lt Jones beats a hasty retreat making smoke as he goes. Lt Peters is happy to comply.
A hasty but truimphant exit!
Very fun game that played fast! Whole thing took just over an hour because only one side moved. LtCdr McSwain was delighted. Lt Van Heiss earned the speed skill and one of the two boats will be fixed for the next mission. Liked the sea/land rules and the 2D6 system worked well. Will have to try it out on some bigger boats now!
Enjoy
Joe
A Saxon and Viking (D12) hero battle it out! Great fun that.
Also penned a humor article called "Confessions of a Dice Junkie" for WI and "Leadership Matters" a variant for SAGA for WSS. Guy at WSS is a nice person but pretty unreliable at answering stuff so I won't hold my breath for the SAGA article. I have almost finished "We got the Beat" my age of Sails variant that Jack has asked about. That should be off in 2 weeks.
Picked up Dog Boats at War by Leonard Reynolds at a used book store. What a great book! It covers the channel, Med and Norway and has a lot of scenario ideas. Am still tweaking my Release the Hounds rules as it is either perfect for MTBs or DDs. Think I found the solution. Roll 2D6s to even out the variance in the combat table but allow for the "big hurt". Also wanted to test out my sea to land rules. So pulled out my MGB flotilla in the Med and sent them against a small port on the island of Sicily using Flotilla Forward. This is only their second battle and their SO is not popular.
Lt Jones RNVR was happy to finally be raising some hell. There last several patrols had found nothing. Tonight his lads would stir up trouble like commandos! All they had to do was run along a port and shoot at anything in it! He could lay off the booze for that.
Lt Jones Haughty/ alcohol avg crew
Lt Van Heiss Naive/ revenge privlaged avg crew
Lt Peters Cheap / family poor crew
The target! 20mm guns on the quays. 2 37mms far left. 2 88mm far right.
Roll for ships in the harbor tonight. One coastal defense ship armed with a 37mm forward.
2 unarmed schooners and a small merchatman.
Dog Boats moving smartly. No random events on the way to target.
Despite visability being almost 2 miles Lt Jones gets to almost a mile before the Italians notice. ( It is late afterall!)
Surprise is almost total as the Dogs begin their run across the mouth of hte port. Tracers flash across the night sky bringing calling cards of death and destruction.
After their run the patrol boat is wreaked and the merchantman is on fire!!!
Lt Jones decides, with only light damage to his own forces, to pass across the entrance one last time. He is tempting fate to accomplish even greater feats. Lt Van Heiss, bent of revenge, couldn't be happier. Lt Peters, is not so sure, but falls into line.
The British do silence one gun on the quay, destroy a truck and damage a schooner but the 88s start to find their mark. Lt Jones' boat is hit causeing engine damage and Lt Van Heiss' boat sustaines a near miss. Lt Jones beats a hasty retreat making smoke as he goes. Lt Peters is happy to comply.
A hasty but truimphant exit!
Very fun game that played fast! Whole thing took just over an hour because only one side moved. LtCdr McSwain was delighted. Lt Van Heiss earned the speed skill and one of the two boats will be fixed for the next mission. Liked the sea/land rules and the 2D6 system worked well. Will have to try it out on some bigger boats now!
Enjoy
Joe
Tuesday, February 11, 2014
Donnybrook/ Analysis and AAR
After 4 games of Donnybrook am starting to get me head around the rules. Read my review of them and thought, good review but no analysis. If I had handed this in at the pentagon my boss would have handed it back! So here is my anaylsis of Donnybrook. Read the review from 7 Feb and then come back...
What I like about Donnybrook is the musket reload card. Sharp's Practice doesn't have this and it is a great idea. To be fair to SP, most of those weapons are rifles but it is a great idea. It adds unpredictability to the reload sequence. ( have to figure out how I am going to do rifles!) I like the card activation in general as I play 90% solitaire and this mechanism is very solitaire friendly. Changing the type of dice is novel and I will see if I like it. For hand to hand I think it works brilliantly and you can differentiate your hero (d12) from some scrub sailor (d6 or 8). As readers of this blog know I have been looking at how to do boarding actions for my pirate games. Donnybrook is the answer almost unmodified! The only modification it needs is for combat to be simultaneous. There are instances (such as first round of boarding) where the defender should go first but the rules state that the attacker normally goes first. This is just too much of an advantage to me and I have played it simultaneous after the first two games and it playes very well. There are not a ton of but several well thought out modifiers that give the combat flavor. It is very bloody but I would expect a Donnybrook to have men quickly out of the fight. (not neccessarily killed) I also love the wound table you roll if a character is hit. It is tied to the type of die so a bigger big man has less chance of being hurt or killed; elegant!! The factions are also well done. The characters by and large are useful, add color and are not too powerful or gamey. This is what is slowly turning me off to SAGA.
What I don't like about Donnybrook is that after playing Sharp Practice the combat in the open seems suicidal. These are muskets not rifles and I can't get anyone across open ground. In SP you need a 5-6 to hit on a D6 at short range. then you roll a save with 1-2 being a miss, 3-5 being shock and a 6 being a kill. In DB you need a 6 to hit and there is no saving throw. That seemed much deadlier upon reading and in practice this has proven to be the case. My asaulting units always get 50% casualties then roll a 1 or 2 on morale and rout or retreat. Now mathimatically this shouldn't happen but it continues. I am not am expert in this period but one of these two game systems has it a bit off. While we are knocking the shooting, unlike the Donnybrook sequence which has a few elegant modifiers, there are no modifiers for muskets other than being in close order-- boo. Now I understand I don't need to hold my fire until I see the whites of their eyes but it would be cool if I had too! The last thing I was disappointed about was the morale rules. They have been kept intentionally simple but they are a bit too simple for my taste. They don't kick in until 50% of your unit is gone and then you either retreat or are removed from the board. This just doesn't seem as elegant and well thought out as other parts of the rules. I was hoping for some wavering and a chance to stop routing troops.
Despite the shortcomings I think it is a very good set of rules. As stated in my review it offers a lot, particularly for someone not well versed in the period. It is easy to make a game complex. It is a tribute to Clarence that Donnybrook is relatively simple. The structure is there for the gamer to add his own level of complexity should he wish too. Highly recommended!
Break Break-----------------------------------------------------------------------------------------------------------
Since this blog is suppose to be about battles I will give you one. I have started to add my house rules to Donnybrook. These include variable movement, new morale, saves in the open for muskets, new leadership rules and two tea break cards instead of one. So far I am going to call this "Donny Practice." Off course once the rules are set I will roll this into a campaign format of "For King and Country." I take you now to Tangiers and Lt Prescot of the 21st regiment of foot...
"Prescot! I need you to take a cannon over to the bastion we are building over near the west side of town. These Wahlahs are all over so take some men with you to ensure the cannon gets there."
So Lt Prescot's adventure in Tangier begins. The men are still settling in so he takes a dozen including a promising Corporal named Tenison. They meet the four naval crew and off they go.
Characters
Lt Prescot D10 LvL 2 Gambler/ wealth
Cpl Tenison D8 Lvl 0 Pragmatic/ religious
standard bearer 11 drilled soldiers
Petty Officer Childs D8 LvL0 and 3 drilled sailors + 1 light cannon.
The board with the Berbers in hiding!
Lt Prescot leads his men!
The evil natives lie in hiding!
Suddenly the sky darkens with arrows and two men fall from the lead column.
Banshees break from cover to attack the column. The English are momentarily stunned!
The Wahlahs are on the cannon before the Navy knows what hit them. The Tars beat a hasty retreat under the Arab wrath.
Cpl Tennison gets his men into a firering line. Will they get off a crushing volley in time?
The Arabs are too fast. The Donnybrook is furious as both sides loose two men. (I play simultaneous.) Unknown to the Corporal at the time, one of the Berbers he knocks unconcious is actually a well respected Berber fighter. Mercifully, the Wahlahs don't like english short swords and retreat back to the palms! ( In the event of a tie both sides take a morale check.)
Meanwhile back at the head of the column...
Lt Prescot recovers his senses orders his men out of column and fires at the advancing calvary. (Being a lvl II leader helps! ) Of course my die rolling continues and 3 of the 4 horsemen are slain in the open even with a saving throw.
Lt Prescot takes stock of his situation. He has 4 men at the back of the column. 2 sailors and 4 men left at the front with arrows starting to rain down that kill another man. While his men are reloading the archers put down their bows, draw swords and ...
CHARGE! The fighting is furious and our Lt is in the thick of it for two rounds. Two additional troopers fall and our Lt is severly wounded but three of the horsemen are slain. The final one turns and leaves to go back to his evil lair.
Great game and I was please that my changes enhanced the game for me. Still working on the musket fire in the open. Will play a couple more games with a 6 saving throw and see how it works. Maybe I am missing something. I really had fun though and that is what counts. For those whishing to try this the Natives had
Leader mounted D10
4 elite calvary bows and long swords
4 drilled calvary spears/ shields
Sgt d8 long sword shield
6 raw infantry with spears or long swords and shields I would probably give them 8 if playing again.
Natives set up hidden. Don't forget English get -1 morale against natives.
Enjoy
Joe
What I like about Donnybrook is the musket reload card. Sharp's Practice doesn't have this and it is a great idea. To be fair to SP, most of those weapons are rifles but it is a great idea. It adds unpredictability to the reload sequence. ( have to figure out how I am going to do rifles!) I like the card activation in general as I play 90% solitaire and this mechanism is very solitaire friendly. Changing the type of dice is novel and I will see if I like it. For hand to hand I think it works brilliantly and you can differentiate your hero (d12) from some scrub sailor (d6 or 8). As readers of this blog know I have been looking at how to do boarding actions for my pirate games. Donnybrook is the answer almost unmodified! The only modification it needs is for combat to be simultaneous. There are instances (such as first round of boarding) where the defender should go first but the rules state that the attacker normally goes first. This is just too much of an advantage to me and I have played it simultaneous after the first two games and it playes very well. There are not a ton of but several well thought out modifiers that give the combat flavor. It is very bloody but I would expect a Donnybrook to have men quickly out of the fight. (not neccessarily killed) I also love the wound table you roll if a character is hit. It is tied to the type of die so a bigger big man has less chance of being hurt or killed; elegant!! The factions are also well done. The characters by and large are useful, add color and are not too powerful or gamey. This is what is slowly turning me off to SAGA.
What I don't like about Donnybrook is that after playing Sharp Practice the combat in the open seems suicidal. These are muskets not rifles and I can't get anyone across open ground. In SP you need a 5-6 to hit on a D6 at short range. then you roll a save with 1-2 being a miss, 3-5 being shock and a 6 being a kill. In DB you need a 6 to hit and there is no saving throw. That seemed much deadlier upon reading and in practice this has proven to be the case. My asaulting units always get 50% casualties then roll a 1 or 2 on morale and rout or retreat. Now mathimatically this shouldn't happen but it continues. I am not am expert in this period but one of these two game systems has it a bit off. While we are knocking the shooting, unlike the Donnybrook sequence which has a few elegant modifiers, there are no modifiers for muskets other than being in close order-- boo. Now I understand I don't need to hold my fire until I see the whites of their eyes but it would be cool if I had too! The last thing I was disappointed about was the morale rules. They have been kept intentionally simple but they are a bit too simple for my taste. They don't kick in until 50% of your unit is gone and then you either retreat or are removed from the board. This just doesn't seem as elegant and well thought out as other parts of the rules. I was hoping for some wavering and a chance to stop routing troops.
Despite the shortcomings I think it is a very good set of rules. As stated in my review it offers a lot, particularly for someone not well versed in the period. It is easy to make a game complex. It is a tribute to Clarence that Donnybrook is relatively simple. The structure is there for the gamer to add his own level of complexity should he wish too. Highly recommended!
Break Break-----------------------------------------------------------------------------------------------------------
Since this blog is suppose to be about battles I will give you one. I have started to add my house rules to Donnybrook. These include variable movement, new morale, saves in the open for muskets, new leadership rules and two tea break cards instead of one. So far I am going to call this "Donny Practice." Off course once the rules are set I will roll this into a campaign format of "For King and Country." I take you now to Tangiers and Lt Prescot of the 21st regiment of foot...
"Prescot! I need you to take a cannon over to the bastion we are building over near the west side of town. These Wahlahs are all over so take some men with you to ensure the cannon gets there."
So Lt Prescot's adventure in Tangier begins. The men are still settling in so he takes a dozen including a promising Corporal named Tenison. They meet the four naval crew and off they go.
Characters
Lt Prescot D10 LvL 2 Gambler/ wealth
Cpl Tenison D8 Lvl 0 Pragmatic/ religious
standard bearer 11 drilled soldiers
Petty Officer Childs D8 LvL0 and 3 drilled sailors + 1 light cannon.
The board with the Berbers in hiding!
Lt Prescot leads his men!
The evil natives lie in hiding!
Suddenly the sky darkens with arrows and two men fall from the lead column.
Banshees break from cover to attack the column. The English are momentarily stunned!
The Wahlahs are on the cannon before the Navy knows what hit them. The Tars beat a hasty retreat under the Arab wrath.
Cpl Tennison gets his men into a firering line. Will they get off a crushing volley in time?
The Arabs are too fast. The Donnybrook is furious as both sides loose two men. (I play simultaneous.) Unknown to the Corporal at the time, one of the Berbers he knocks unconcious is actually a well respected Berber fighter. Mercifully, the Wahlahs don't like english short swords and retreat back to the palms! ( In the event of a tie both sides take a morale check.)
Meanwhile back at the head of the column...
Lt Prescot recovers his senses orders his men out of column and fires at the advancing calvary. (Being a lvl II leader helps! ) Of course my die rolling continues and 3 of the 4 horsemen are slain in the open even with a saving throw.
Lt Prescot takes stock of his situation. He has 4 men at the back of the column. 2 sailors and 4 men left at the front with arrows starting to rain down that kill another man. While his men are reloading the archers put down their bows, draw swords and ...
CHARGE! The fighting is furious and our Lt is in the thick of it for two rounds. Two additional troopers fall and our Lt is severly wounded but three of the horsemen are slain. The final one turns and leaves to go back to his evil lair.
Great game and I was please that my changes enhanced the game for me. Still working on the musket fire in the open. Will play a couple more games with a 6 saving throw and see how it works. Maybe I am missing something. I really had fun though and that is what counts. For those whishing to try this the Natives had
Leader mounted D10
4 elite calvary bows and long swords
4 drilled calvary spears/ shields
Sgt d8 long sword shield
6 raw infantry with spears or long swords and shields I would probably give them 8 if playing again.
Natives set up hidden. Don't forget English get -1 morale against natives.
Enjoy
Joe
Thursday, February 6, 2014
The Donnybrook Review
Finally got the Donnybrook rules I have wanted. Must commend Mr Hilton on his customer service as it was quite an ordeal to get the money paypal'ed to him!
Have played four games withe them so here are my impressions: be advised I have never met a set of rules I have totally liked!
First off the production values of the book are top notch. There are tons of colored (coloured if you are from the wrong side of the pond) pictures of well painted figures to inspire and the book is well layed out. It comes in at 110 pages so there is plenty to look at. There is no index but there is a separate quick referance sheet which answers 90% of questions.
The rules are card activation type with units getting to move or fire on their card. (Someone will say the rules state you can do both but practically musket units can't. ) Firering units having to roll a number (6) to achieve a hit. Each man gets to roll a die. The better drilled a unit the larger type of die (D6, D8 ect) it gets to use. Units in cover get a save roll. If you are hit you are dead. (Since units in the open don't get a save roll combat in the open is very deadly. ) Think Piquet at the skirmish level without impetis and you get the idea. They do include a "turn end" card and a "musket reload" card to add some chaos.
There is no variable movement unless you move through broken terrain then you roll 2 die and take the higher.
Morale does not come into play unless a unit is at 50% strength then the unit takes a morale check with each loss. This can result in retreating or routing off the board. The loosing unit in a melee (a donnybrook) also takes a moral check. Donnybrooks are handled similarly to firering except while there are a noticalbe abscence of modifers there, their are some cool modifiers here. As an example long swords and bayonets get a +1.
The rules also introduce characters which, as you might expect, add a lot of character to the game. A great thing about character is when they are killed they get to roll on the character killed table which will result in them being unconsious, killed, reduced in ability or barely scratched. There are also a list of "factions" that include government troops, outlaws, highlanders and the like. Each of these factions have their unique characters. These characters bring unique things to the table. For example, the highlanders have a piper. Any unit within the sound of him (a foot) can throw 2 dice for their morale check and take the better one. Most of the factions are written generically enough that the player can use them for many things. For example, Outlaws can easily be modified to be highwaymen in Scotland, smugglers on the continent or Pirates in the Carribean.
Factions included are government troops, civilian mob, covenanters, cultists, highlanders, outlaws, rapparees and tribal. These all look fun but the cultists and civilian mob seem gamey to me.
Next there is a section on weapons and special rules. This is helpful and it is short.
Afterwards is a section of events that can be used. While fun to read I don't think anyone would use these in a game. The effects of some are huge but some people might like them.
Next come 6 scenarios that are pretty standard fare.
The seventh scenario is not only well thought out but is shown in comic book format using painted miniatures! Very cool! I am going to order some Spanish just because of this scenario.
Finally the book ends with 20 pages of light history of various wars copiously illustrated with photos of miniatures. For people that are well versed in this time period and know how to paint the figures, this will be a waste; but for me I really enjoyed this part of the book.
Pros:
Great looking pictures and history for novices
Best melee (Donnybrook) rules I have seen
Card activation easy for solitaire games
Factions are fun without being too gamey
Cons:
Musket combat too deadly in open (I have only had one instance where a unit succesfully charged and managed to get into close combat with a musket unit. Have modified this to units in open get a saving throw of 6.)
Morale rules weak (I was expecting more meat here.)
Bottom Line
These are a great set of rules and I recommend them. They are simple and fun. They are particularly useful if you do not know the period. I am tinkering with the morale rules and am going to incorporate Big Men into the system. It is a tribute to Clarence that his rules are sound enough to bear these changes. The other changes I have done are: variable movement and added a second Tea break card. ( Muskets are only reloaded if the card comes up before the first tea break card though.)
Enjoy
Joe
Have played four games withe them so here are my impressions: be advised I have never met a set of rules I have totally liked!
First off the production values of the book are top notch. There are tons of colored (coloured if you are from the wrong side of the pond) pictures of well painted figures to inspire and the book is well layed out. It comes in at 110 pages so there is plenty to look at. There is no index but there is a separate quick referance sheet which answers 90% of questions.
The rules are card activation type with units getting to move or fire on their card. (Someone will say the rules state you can do both but practically musket units can't. ) Firering units having to roll a number (6) to achieve a hit. Each man gets to roll a die. The better drilled a unit the larger type of die (D6, D8 ect) it gets to use. Units in cover get a save roll. If you are hit you are dead. (Since units in the open don't get a save roll combat in the open is very deadly. ) Think Piquet at the skirmish level without impetis and you get the idea. They do include a "turn end" card and a "musket reload" card to add some chaos.
There is no variable movement unless you move through broken terrain then you roll 2 die and take the higher.
Morale does not come into play unless a unit is at 50% strength then the unit takes a morale check with each loss. This can result in retreating or routing off the board. The loosing unit in a melee (a donnybrook) also takes a moral check. Donnybrooks are handled similarly to firering except while there are a noticalbe abscence of modifers there, their are some cool modifiers here. As an example long swords and bayonets get a +1.
The rules also introduce characters which, as you might expect, add a lot of character to the game. A great thing about character is when they are killed they get to roll on the character killed table which will result in them being unconsious, killed, reduced in ability or barely scratched. There are also a list of "factions" that include government troops, outlaws, highlanders and the like. Each of these factions have their unique characters. These characters bring unique things to the table. For example, the highlanders have a piper. Any unit within the sound of him (a foot) can throw 2 dice for their morale check and take the better one. Most of the factions are written generically enough that the player can use them for many things. For example, Outlaws can easily be modified to be highwaymen in Scotland, smugglers on the continent or Pirates in the Carribean.
Factions included are government troops, civilian mob, covenanters, cultists, highlanders, outlaws, rapparees and tribal. These all look fun but the cultists and civilian mob seem gamey to me.
Next there is a section on weapons and special rules. This is helpful and it is short.
Afterwards is a section of events that can be used. While fun to read I don't think anyone would use these in a game. The effects of some are huge but some people might like them.
Next come 6 scenarios that are pretty standard fare.
The seventh scenario is not only well thought out but is shown in comic book format using painted miniatures! Very cool! I am going to order some Spanish just because of this scenario.
Finally the book ends with 20 pages of light history of various wars copiously illustrated with photos of miniatures. For people that are well versed in this time period and know how to paint the figures, this will be a waste; but for me I really enjoyed this part of the book.
Pros:
Great looking pictures and history for novices
Best melee (Donnybrook) rules I have seen
Card activation easy for solitaire games
Factions are fun without being too gamey
Cons:
Musket combat too deadly in open (I have only had one instance where a unit succesfully charged and managed to get into close combat with a musket unit. Have modified this to units in open get a saving throw of 6.)
Morale rules weak (I was expecting more meat here.)
Bottom Line
These are a great set of rules and I recommend them. They are simple and fun. They are particularly useful if you do not know the period. I am tinkering with the morale rules and am going to incorporate Big Men into the system. It is a tribute to Clarence that his rules are sound enough to bear these changes. The other changes I have done are: variable movement and added a second Tea break card. ( Muskets are only reloaded if the card comes up before the first tea break card though.)
Enjoy
Joe
Tuesday, January 21, 2014
Pirate raid on Stuart's towne
Fianlly pre ordered Donnybrook. It was really difficult but that is another story. While waiting played a game using Sharpe Practice but inserting the combat system for Donnybrook. This was difficult as I don't have the rules yet but worked quite well I must say!
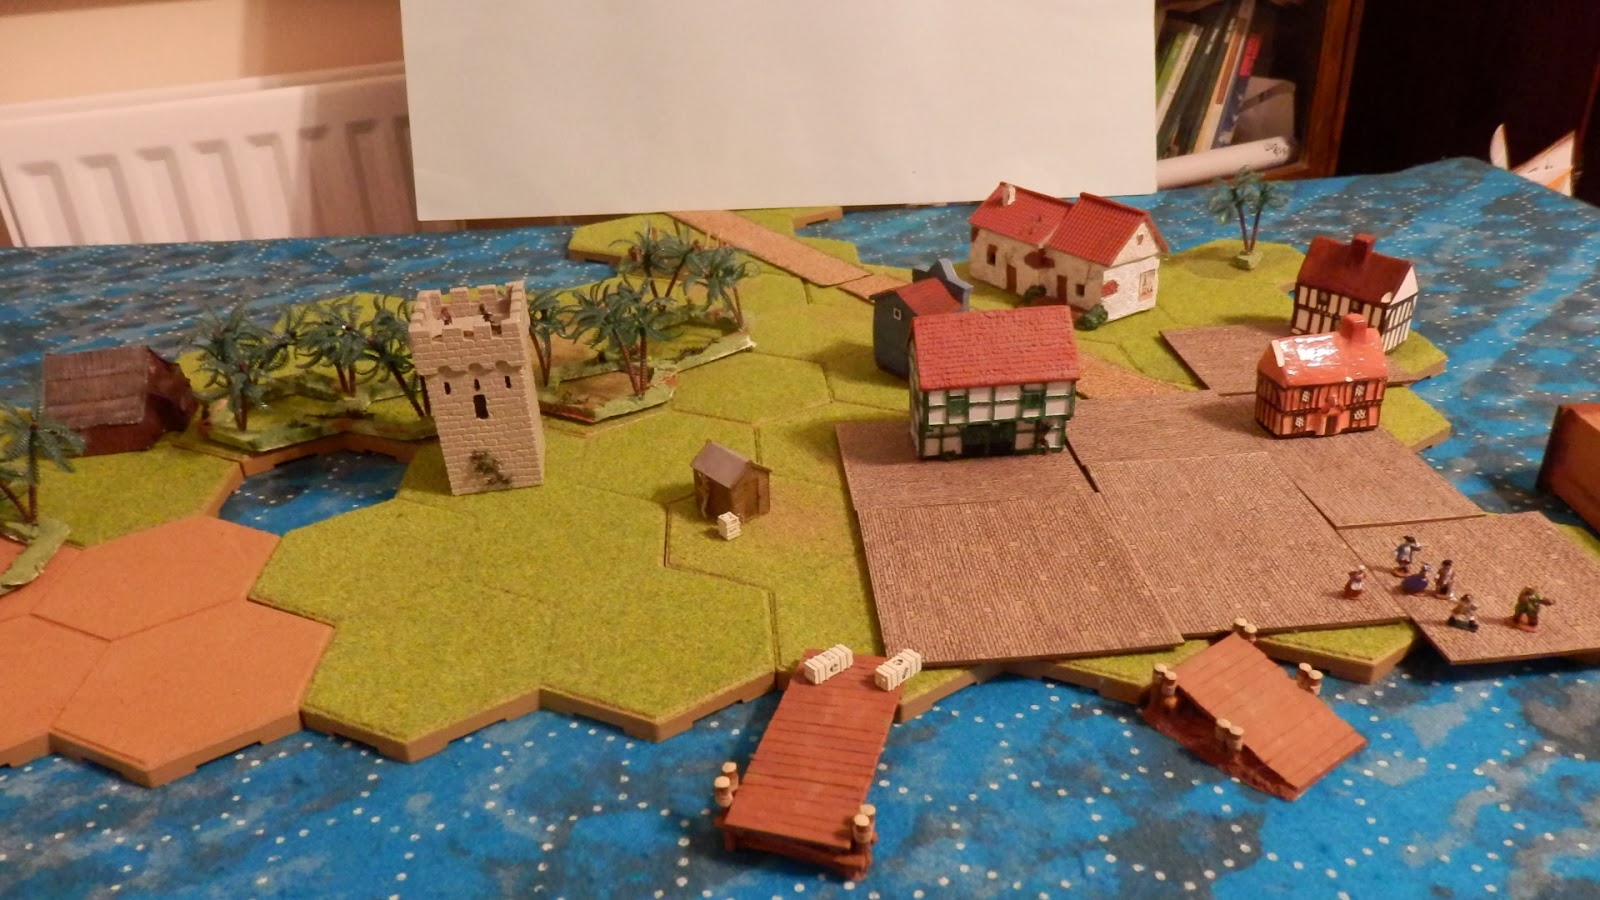
This was a pirate raid by Black Bart (Gr II) and 22 pirates against Stuart's Towne. The initail defense were two militia in the tower.
Pirates quiet the militia in the tower led by Buccaner Dan.
Black Bart landed in the towne with the goal to ransack 3 buildings. Unfortunatly 6 militia showed led by Lt Tucker.
Despite the pirates rolling D8s and the militia rolling D6s the Donnybrook was a draw with both leaders lightly wounded. The militia retreated to the Salmon colored house. They were just buying time until the regulars showed up.
Meanwhile Buccaner Dan ransacked one house and started on another when...
Lt Radford showed up with some sailors from the HMS Anglia.
Another Donnybrook ensued.
With HM sailors eventually getting the better of the pirates and killing Bucanner Dan.
( Don't you hate when your figures stop fighting to pose for the camera like the pirate on the left!)
With this setback the pirates retreated back to the Docks as did Black Bart. Lt Radford was not keen to close as his numbers had dwindled significantly. Lt Tucker and his survivors were still in their house.
At this point drums could be heard...
This sealed the deal for Black Bart and his motley crew entered their boats and rowed back to their ships before the soldiers could line up to fire.
Stuart's Towne had been saved!!!!!
Great game that played pretty fast. I actually liked my modifications to Sharpe Practice. Curious to see how close they are to the Donnybrook rules.
For those of you that want to try this
Black Bart, Buccaneer Dan (Gr I) and two other Gr I leaders plus 20 pirates. They have 10 muskets and are raw for firering and elite for melee.
Militia led by Lt Tucker ( Gr I hesitant commander card) 8 soldiers (raw)
HM sailors led by Lt Radford ( Gr I ) 10 saliors 3 muskets raw for firering and elite for melee
Queen's Own led by Lt Sampson ( Gr II ) 12 muskets drilled
Militia come in on the first reinforcement card; sailors on the third, Queens own on the 6.
Enjoy
Joe
This was a pirate raid by Black Bart (Gr II) and 22 pirates against Stuart's Towne. The initail defense were two militia in the tower.
Stuart's Towne!!
The pirates landed in two boats only carrying 8 men, one at the beach on the right and 8 more at the dock. The rest had to come in two cards later.
Pirates quiet the militia in the tower led by Buccaner Dan.
Black Bart landed in the towne with the goal to ransack 3 buildings. Unfortunatly 6 militia showed led by Lt Tucker.
Despite the pirates rolling D8s and the militia rolling D6s the Donnybrook was a draw with both leaders lightly wounded. The militia retreated to the Salmon colored house. They were just buying time until the regulars showed up.
Meanwhile Buccaner Dan ransacked one house and started on another when...
Lt Radford showed up with some sailors from the HMS Anglia.
Another Donnybrook ensued.
With HM sailors eventually getting the better of the pirates and killing Bucanner Dan.
( Don't you hate when your figures stop fighting to pose for the camera like the pirate on the left!)
With this setback the pirates retreated back to the Docks as did Black Bart. Lt Radford was not keen to close as his numbers had dwindled significantly. Lt Tucker and his survivors were still in their house.
At this point drums could be heard...
This sealed the deal for Black Bart and his motley crew entered their boats and rowed back to their ships before the soldiers could line up to fire.
Stuart's Towne had been saved!!!!!
Great game that played pretty fast. I actually liked my modifications to Sharpe Practice. Curious to see how close they are to the Donnybrook rules.
For those of you that want to try this
Black Bart, Buccaneer Dan (Gr I) and two other Gr I leaders plus 20 pirates. They have 10 muskets and are raw for firering and elite for melee.
Militia led by Lt Tucker ( Gr I hesitant commander card) 8 soldiers (raw)
HM sailors led by Lt Radford ( Gr I ) 10 saliors 3 muskets raw for firering and elite for melee
Queen's Own led by Lt Sampson ( Gr II ) 12 muskets drilled
Militia come in on the first reinforcement card; sailors on the third, Queens own on the 6.
Enjoy
Joe
Subscribe to:
Posts (Atom)